We've run the gauntlet: deep-water buckets humming in the lab, coco drippers on timers, and big fabric pots of living soil that smell like a forest floor after rain.
After running them all, we can tell you the blunt truth: soil is the most forgiving, flavorful, and reliable foundation for most growers.
While coco offers turbocharged speed and hydro is a rocket ship for tinkerers, soil is where you learn the plant. It's the most "set-and-vibe" medium that builds incredible terpene profiles.
This guide is your masterclass in soil—a vital chapter in our comprehensive guide on how to grow weed indoors. We'll show you how to choose the best bags, mix your own killer blends, and tailor it perfectly for autoflowers.
As always, watch the plant, not the calendar, and if you need high-quality seeds, we've got your back at Weedseedsexpress.
Key Takeaways
- Soil vs. The Rest: Soil is the most forgiving for beginners. Coco delivers faster growth with daily fertigation, and hydro maximizes speed for experts. For flavor and ease of use, start with soil.
- The Ideal Mix: Pick loamy soil with 15–30% aeration (perlite, pumice) for fast drainage. Use fabric pots and learn proper watering by lifting the pot to feel its weight.
- The Golden Rules: Keep irrigation water at pH 6.0–6.5. Use organic nutrients or run bottled nutrients at 50–70% strength. Track your EC and add light Cal-Mag under LEDs as needed.
- Beginner-Friendly Plan: Start seedlings in a light mix (e.g., Happy Frog). Transplant to a richer soil like Ocean Forest around day 10–14. Always add 20–30% extra perlite to any bagged soil.
- DIY Options: A simple mix of 40% base soil + 20% coco + 20% perlite + 20% worm castings works great. Or, build a "super soil" with 8–12% amendments and "cook" it for 3–6 weeks for a near water-only grow.
- Autoflower Soil: Use a lighter blend: 50% light base + 30% coco + 20% perlite. Avoid overwatering, start feeds at a low 0.6–0.8 EC, and favor LST over aggressive training.
What Makes a Quality Cannabis Soil? The 4 Cornerstones
Ideal Texture: Why "Loamy" Soil is Best
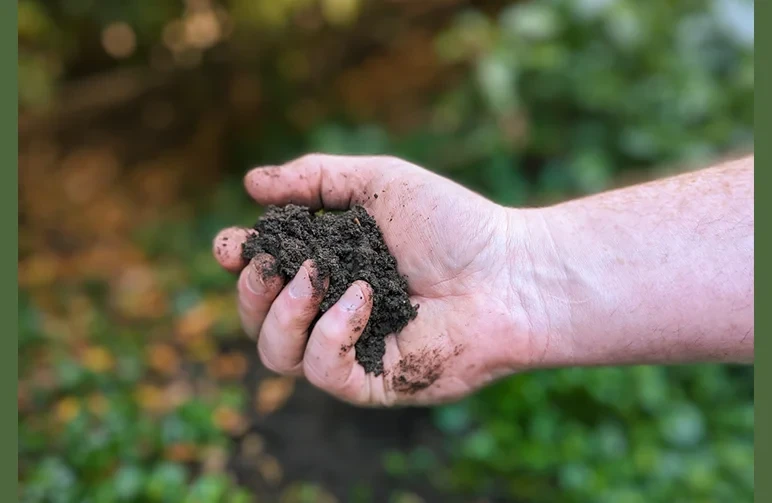
Loam is the Goldilocks zone for soil: a balanced mix of sand (for drainage), silt (for structure), and clay (for holding nutrients). In our grow rooms, true loam prevents the two biggest rookie errors: overwatering and suffocating roots.
You want a crumbly, airy feel that breaks apart in your hand but still clumps lightly when squeezed. That micro-structure keeps oxygen flowing to the root zone while holding enough moisture for steady uptake.
Too heavy and you get droop, fungus gnats, and slow growth. Too light and you're stuck watering twice a day.
Drainage vs. Water Retention: Finding the Perfect Balance
Cannabis roots need to breathe. Great soil drains quickly, but not so fast that it turns to dust. The sweet spot: water should move through in a steady stream, and the surface shouldn't have pools of water after a few seconds.
We aim for 15–30% aeration additives (perlite, pumice, rice hulls) in most indoor blends. Fabric pots are a massive help, too—they boost gas exchange and prevent roots from circling into a tangled mess.
Pro Tip: Lift your pots. Feel the weight before and after watering. That tactile feedback is the single best way to learn exactly when your plant is ready for another drink.
The Optimal pH Range for Cannabis Roots
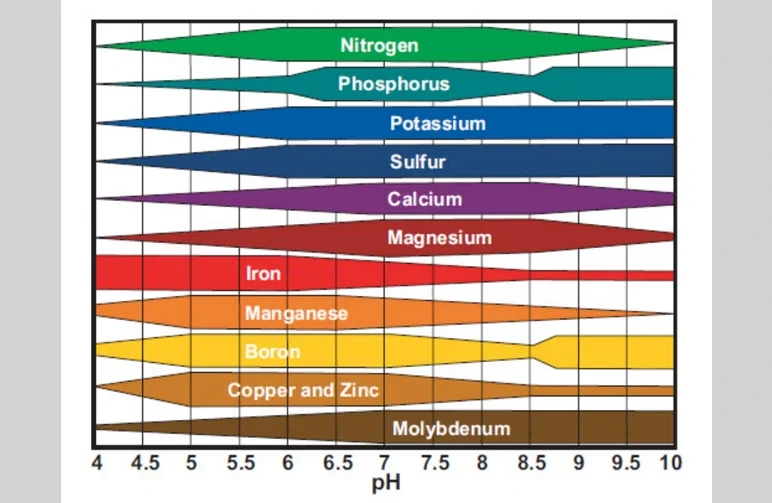
Soil naturally buffers pH, which is why it's so beginner-friendly. Keep your irrigation water in the 6.0–6.5 pH window and you'll avoid most nutrient lockout headaches.
This is the range where cannabis can easily absorb Calcium, Magnesium, and the big three (N-P-K).
If you're feeding synthetic salts, pH your water every time. If you're running organics with healthy microbes, minor swings will usually self-correct. Yellowing at new growth with crisp tips? Could be too acidic.
Pale leaves with dark veins? Could be too alkaline. But always diagnose holistically—pH, EC, and watering rhythm all play together.
Essential Nutrients: A Quick Look at N-P-K
- Nitrogen (N): Drives leafy green growth during the vegetative stage.
- Phosphorus (P): Supports root development and massive flower formation.
- Potassium (K): Regulates water movement, overall vigor, and resin production.
In soil, we prefer slow-release organics like worm castings, compost, and dry amendments. If you use bottled nutrients, follow this rule: start at 50–70% of the recommended strength.
For a complete list of what your plants need at every stage, see our cannabis nutrient guide.
Watch your runoff EC and let the plant's response guide you. Don't forget Calcium and Magnesium (especially under LEDs), which are crucial bonus minerals.
Easiest Path for Beginners: The Best Pre-Made Potting Soils

Fox Farm: The Industry Standard
Fox Farm is an indoor staple for a reason.
- Ocean Forest: A "hot," nutrient-rich soil that's great for established photoperiods. However, it can be too spicy for seedlings and many autoflowers.
- Happy Frog: A gentler, all-in-one soil that's friendlier for young plants, with beneficial microbes baked right in.
Our go-to method: start seeds in a light mix, then transplant into Ocean Forest at the 10–14-day mark for a smooth transition. No matter which you choose, mix in 20–30% extra perlite for better airflow.
Other Top-Rated Soil Brands to Consider
- Roots Organics Original: Fluffy, microbe-rich, and drains beautifully. We've pulled stupidly dense flowers from this with simple top-dresses.
- Mother Earth Groundswell: A balanced and consistent mix. A nice middle ground if Ocean Forest feels too hot.
- BioBizz All·Mix and Light·Mix: European classics. All·Mix is richer; Light·Mix gives you more control with liquid feeds.
- Black Gold or Coast of Maine: Reliable base soils. Just be sure to bump up the aeration by 15–25%.
If simplicity is your goal, pair any of these with a one-bottle organic feed, keep your pH honest, and don't overwater. This is how you learn to listen to your plant.
DIY Soil Mixes: Creating Your Own Perfect Blend

A Simple DIY Recipe for First-Time Growers
When we onboard new team members, we hand them this no-drama mix. It's airy, lightly fed, and super adaptable.
- 40% Base Soil (Fox Farm Happy Frog or BioBizz Light·Mix)
- 40% Aeration/Structure (split 20% coco coir + 20% perlite)
- 20% Worm Castings (for nutrition and biology)
Veg with a mild grow feed, then switch to a bloom formula with a phosphorus/potassium nudge when you flip to flower. Start in 3–5 gallon fabric pots for indoor grows.
The "Super Soil" Method for a Water-Only Grow
If you want the low-maintenance, terpy magic of organics, build a "super soil." Mix a quality base soil with amendments like kelp meal, neem meal, fish bone meal, crustacean meal, and basalt rock dust.
Keep total amendments around 8–12% by volume and let the mix "cook" for 3–6 weeks—moist, aerated, and warm—so microbes can pre-digest the nutrients.
To avoid burning seedlings, layer the super soil in the bottom third of the pot and use a lighter mix on top. Done right, you can cruise on water-only or occasional teas.
Understanding Common Soil Amendments
For Aeration and Drainage
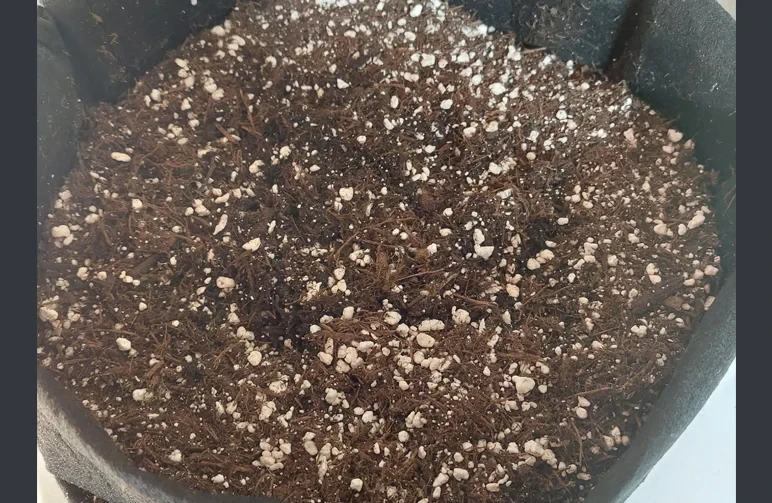
- Perlite: Lightweight volcanic glass that keeps mixes fluffy. We run 15–30%.
- Pumice or Lava Rock: Heavier than perlite and won't float to the top. Great for outdoor beds.
- Rice Hulls: A sustainable option that breaks down over time, perfect for living soil.
For Water Retention and Structure
- Coco Coir: Adds air and holds moisture without getting swampy. Always use buffered coco.
- Peat Moss: An excellent sponge but slightly acidic. We use it sparingly for sustainability reasons.
- Vermiculite: Holds water and nutrients, but use it lightly to avoid an overly wet mix.
For Organic Nutrition
- Worm Castings: A biological powerhouse full of gentle nitrogen, enzymes, and microbes.
- Compost: Adds life and humus to your soil. Screen it to avoid clumps.
- Kelp Meal: Provides micronutrients and boosts plant resilience.
- Fish Bone/Bone Meal: A fantastic source of phosphorus and calcium for the bloom stage.
The Best Soil for Autoflowers
Why Autoflowers Need a Lighter Soil Mix
Autos are on a fixed schedule. Any stress—from heavy soil, hot nutrients, or overwatering—steals time from their short veg window, reducing your final yield.
We see much better vigor and results when autos start in a lighter, airier mix. That means more perlite and a gentler nutrient profile.
A Recommended Autoflower Soil Recipe
- 50% Light Base Soil (Happy Frog, BioBizz Light·Mix)
- 30% Coco Coir (pre-buffered)
- 20% Perlite
- (Optional) Add 10-15% worm castings, reducing the base soil to fit.
Keep nutrition gentle for the first 2-3 weeks. pH your irrigation to 6.2. Start your first feed at a low 0.6–0.8 EC once the first true leaves appear, then ramp up slowly.
Key Tips for Growing Autoflowers in Soil
- Don't Overwater: Water in a ring around the seedling to encourage roots to search outward.
- Minimal Training:(LST) or Low-Stress-Training is great. Aggressive topping can stall smaller autos.
- Cal-Mag under LEDs: LEDs can increase demand for Cal-Mag and other micronutrients.
- Feed Light, Watch Pistils: As soon as you see the first white pistils, pivot to your bloom nutrient ratios.
If you're hunting an easy win, pair this soil advice with resilient genetics. Our autoflower seeds are tested and backed by real grow diaries.
Frequently Asked Questions
Q: Soil vs hydro vs coco: which is best for beginners and why?
For first-time growers, soil is the clear winner. It naturally buffers pH (6.0–6.5), is forgiving with nutrients, and supports beneficial microbes. Coco is faster but needs daily feeding. Hydro offers maximum speed but is unforgiving of errors.
Q: What’s the best soil mix for autoflowers?
Use a lighter, airier blend to reduce stress: 50% light base soil (like Happy Frog), 30% pre-buffered coco coir, and 20% perlite. Irrigate at a pH of ~6.2 and start feeds very gently once the first true leaves have stacked.
Q: How do I make a simple DIY or super soil for cannabis?
For a simple DIY mix, combine 40% base soil, 20% coco, 20% perlite, and 20% worm castings.
For a "super soil," amend a quality base with 8-12% total amendments (kelp, neem meal, bone meal, etc.), let it "cook" for 3–6 weeks, and layer it at the bottom of your pot.
Q: Can I reuse my soil for another cannabis grow?
Yes, but it needs to be "re-amended." After harvest, remove the old root ball, break up the soil, and mix in fresh worm castings, compost, and a balanced dry amendment blend to replenish nutrients.
Let it sit for a few weeks before reusing. Never reuse soil from a plant that had pests or diseases.
Q: What's the difference between organic soil and "super soil"?
All super soil is organic, but not all organic soil is "super soil." A standard organic soil provides a good base but still requires liquid nutrients or top-dressing.
A true "super soil" is pre-amended so heavily with slow-release nutrients that it can sustain a plant from seed to harvest with little more than plain water.
Q: Do I need special soil for seedlings?
It's highly recommended. Seedlings are very sensitive and can be "burned" by nutrient-rich soil.
Use a dedicated light mix for the first 10-14 days. This is a critical stage that happens immediately after you germinate your seeds, so keep it gentle to avoid stunting young roots.
What Have We Learned? (Conclusion)
Choosing your medium boils down to your priorities. Soil is the chill mentor: buffered pH, forgiving on feeds, and big on flavor. For most growers, especially your first few runs, soil wins.
Start with a quality bagged mix, add extra perlite, dial in your pH, and don't drown your pots. Once you've learned the plant's language, you can explore other methods.
Wherever you land, genetics decide the ceiling. Grab stable, high-vigor seeds from growers you trust and grow something you're proud of.


