

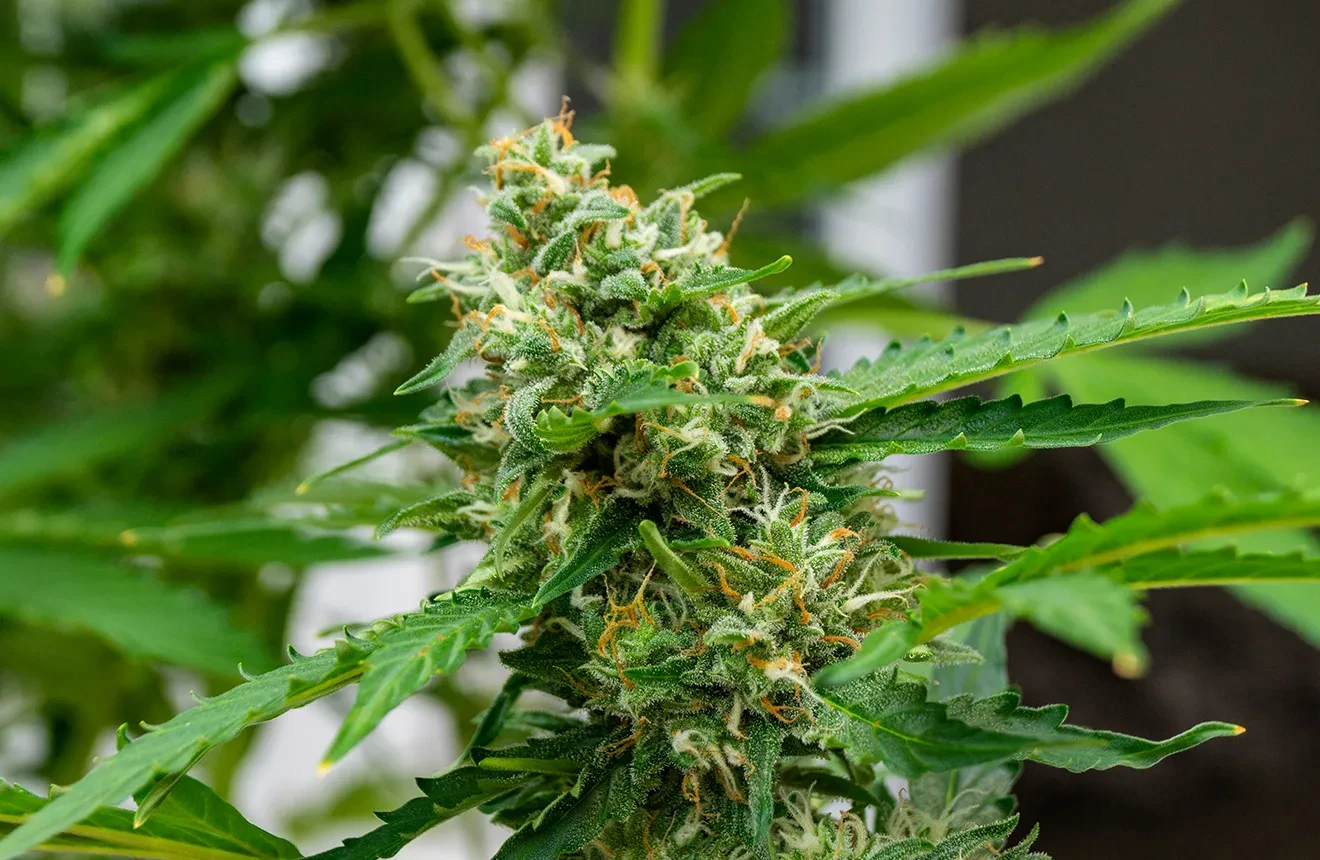
If you have ever stared at a bottle of plant food and wondered if it will fry your autoflowers, you are in the right place.
The biggest mistake new growers make is feeding their autos way too much. They look at the feeding chart on the back of a nutrient bottle, mix up a full dose, and pour it right into the soil.
A few days later, their plants are crispy, yellow, and dying.
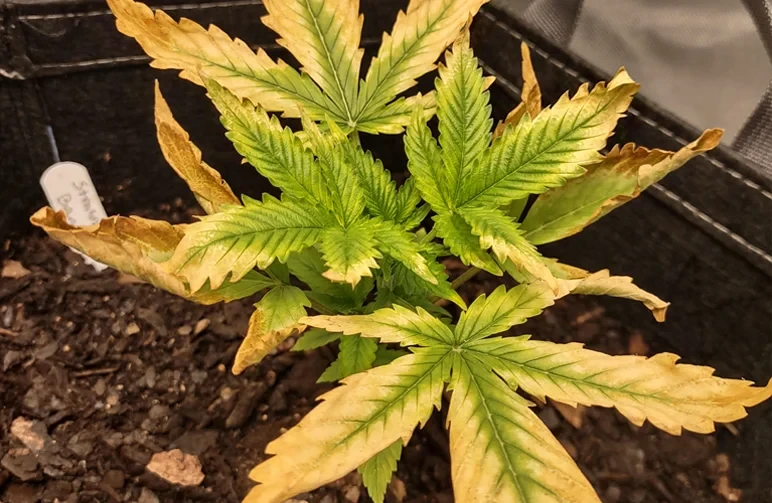
Autoflowers are not like regular weed plants. They have smaller roots. They grow much faster. Because of this, they need a much lighter diet to survive and thrive.
In this guide, we are going to strip away all the confusing forum noise. By the end of this page, you will have a simple, week-by-week feeding schedule.
You will know exactly how to protect your yields, keep your leaves green, and grow top-shelf buds without needing a chemistry degree.
Key Takeaways
- Start very light: Always start with a quarter of the recommended dose on your nutrient bottle. You can always add more food later, but you cannot take it out once it is in the dirt.
- Watch your Nitrogen: Give your plants Nitrogen during the vegetative stage, but cut back as soon as you see the first white hairs.
- Lock in your pH: If your water pH is wrong, your plant cannot eat. Keep soil between 6.0 and 7.0. Keep coco coir between 5.5 and 6.5.
- Flush before harvest: Always feed your plants plain water for the last week to clean out the salts and improve the taste of your final smoke.
Why Autoflowers Need Less Plant Food
Autoflowers come from a tough, wild type of weed called Cannabis ruderalis. Because of these genetics, they flip to the flowering stage all on their own. You do not need to change your light timer to make them bloom.
This automatic switch means they have a very short lifecycle. Most autoflowers go from a seed to a fully finished plant in just 9 to 11 weeks.
This rapid timeline leaves you with zero room for error. If you burn a regular photoperiod plant with too much food, you can just keep it in the vegetative stage for a few extra weeks to heal.
If you burn an autoflower, it just keeps growing. It will stay small, lock up its roots, and give you a terrible yield.
Autoflowers also grow in smaller pots. This means they have smaller root zones. A small root system simply cannot handle a massive dose of chemical salts.
If you follow the standard feeding chart on a nutrient bottle, you will almost certainly kill your plant. Those charts are made for massive plants that grow for six months.
The golden rule for feeding autoflowers is simple. Start light, watch the leaves, and make tiny adjustments.
The Best Soil for Autoflowers (And Why It Matters)
Your feeding schedule depends entirely on what your plant is growing in.
A lot of beginners go to the local hardware store and buy "hot" soils like Miracle-Gro. Please, do not do this. Hot soils are packed with slow-release chemical fertilizers.
If you plant an autoflower in hot soil, it will burn the fragile seedling roots almost immediately. You also have absolutely zero control over when the plant gets fed.
You want to use a "light mix" soil instead. A light mix has just enough natural food to keep the plant happy for the first two or three weeks. After that, the soil runs out of food.
This is actually perfect. It gives you total control to add exactly what the plant needs, exactly when it needs it.
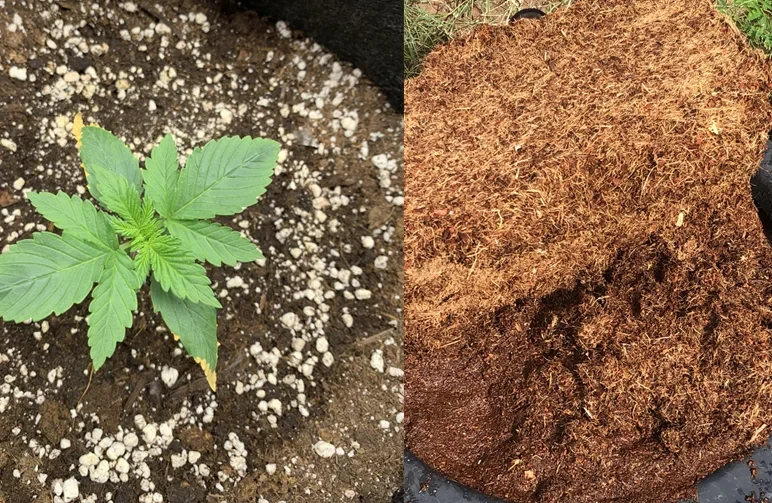
If you want even more control, you can grow in coco coir. Coco has absolutely zero nutrients in it. You have to provide every single drop of food from day one.
Understanding N-P-K for Autoflowers
Pick up any bottle of cannabis nutrients. You will always see three numbers stamped on the front label. These numbers stand for N-P-K. That is Nitrogen, Phosphorus, and Potassium.
These are the heavy hitters of plant food.
- Nitrogen (N): This is the engine for green growth. It builds strong stems and massive fan leaves. Your plant craves Nitrogen during the vegetative stage.
- Phosphorus (P): This builds a strong root network and pushes out new buds.
- Potassium (K): This keeps the whole plant healthy. It fights off disease and helps pack serious weight onto your flowers.
When your plant is young, it has one job. It needs to grow tall and wide. To do this, it needs a lot of Nitrogen.
But once your plant starts making buds, the game changes. It needs less Nitrogen and a lot more Phosphorus and Potassium.
If you keep feeding heavy Nitrogen during the flowering stage, you will get airy, leafy buds instead of dense, top-shelf colas.
The Ultimate Autoflower Feeding Schedule (Week by Week)
Every weed strain is a little different. But this baseline schedule will keep your plants safe and your yields high.
We are going to use PPM to measure the plant food. PPM stands for Parts Per Million. It is just a number that tells you how strong your nutrient water is.
If you use an EC meter instead, I have included those numbers for you too.
Weeks 1 to 2: The Seedling Stage
The seed and your light mix soil have all the food the plant needs right now. Do not add any base nutrients.
- Target PPM: 100 to 200 (EC 0.2 to 0.4)
- Soil Growers: Give your plants plain, pH-balanced water only.
- Coco Growers: Give them a very light dose of Cal-Mag and a tiny drop of seedling nutrients.
Weeks 3 to 4: The Vegetative Stage
Your plant is growing fast and pushing out side branches. It is time to introduce a light dose of Nitrogen-rich grow nutrients.
- Target PPM: 600 to 800 (EC 1.2 to 1.6)
- Soil Growers: Feed your plants once a week. Water them with plain water when the pot feels light in between feedings.
- Coco Growers: Feed a light dose every single day. Always include Cal-Mag.
Weeks 5 to 6: Pre-Flowering and Stretch
You will start seeing white hairs. The plant will stretch and get tall. It is time to transition to your bloom nutrients. Drop the Nitrogen down a bit and bump up the Phosphorus and Potassium.
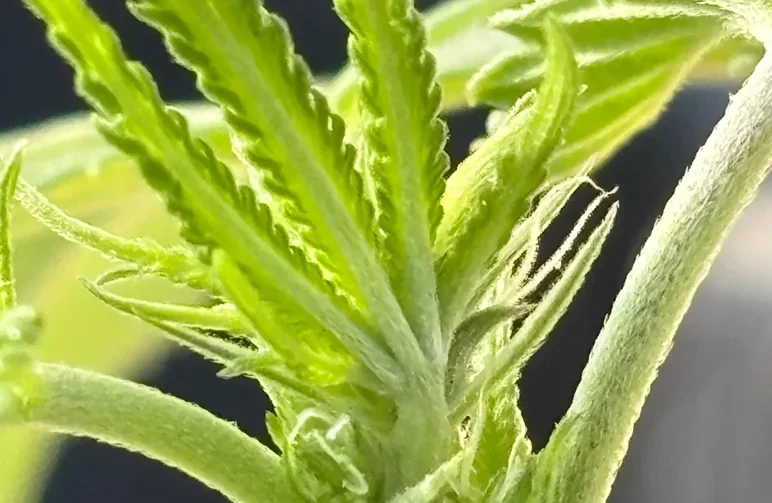
- Target PPM: 900 to 1100 (EC 1.8 to 2.2)
- Soil Growers: Feed once a week.
- Coco Growers: Feed one or two times a day depending on how fast the pot dries out.
Weeks 7 to 9: Full Flower
The buds are swelling up and starting to smell amazing. Keep the Nitrogen low. Let the Phosphorus and Potassium do the heavy lifting to build dense flowers.
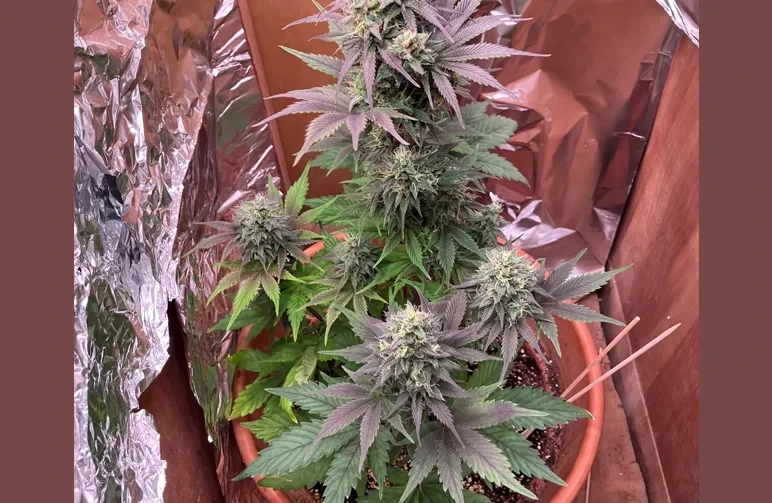
- Target PPM: 1000 to 1200 (EC 2.0 to 2.4)]
- Soil Growers: Feed once a week. Watch the leaf tips carefully for any signs of burning.
- Coco Growers: Feed daily. Make sure 10 to 20 percent of the water runs out the bottom of the pot. This prevents salt buildup.
Weeks 10 and Beyond: Ripening and Flushing
The white hairs are turning orange and brown. The buds are almost done. It is time to flush.
- Target PPM: Drop to 200, then down to 0.
- All Growers: Stop feeding base nutrients. Taper down your mix for a few days. Then give the plant plain, pH-balanced water until harvest.
Organic vs. Synthetic Nutrients for Autos
You have two main choices when you buy plant food. You can go organic, or you can go synthetic. Both work great, but they do things very differently.
Synthetic Nutrients
These are made in a lab. Think of them like liquid energy drinks for your plants. They feed the roots directly. This means they work incredibly fast.
If your plant looks hungry, synthetic nutrients can fix the problem in a single day.
But there is a catch. They are very strong. It is incredibly easy to burn an autoflower if you mix synthetic nutrients too hot. If you use these, you have to check your water with an EC meter every single time you feed.
Organic Nutrients
These come from natural sources like bat guano and worm castings. Organic food does not feed the plant directly. Instead, it feeds the helpful microbes living in your soil.
Those microbes break the food down and hand it to the roots.
Organic growing is much slower. But it is also very forgiving. It is much harder to burn your plants with an organic line. If you are growing in soil and want a stress-free run, organic is a great way to go.
This forces the plant to eat its stored food. It makes the final smoke much smoother and cleaner.
How to Spot Nutrient Burn (And Fix It Fast)
If you feed your plants too much, they will let you know.
Nutrient burn starts at the very tips of the leaves. The tips will turn bright yellow, then brown, and then they will get crispy. If you ignore it, the burn will travel up the edges of the leaves.
You might also see the leaves turn a dark, toxic-looking green and claw downwards.
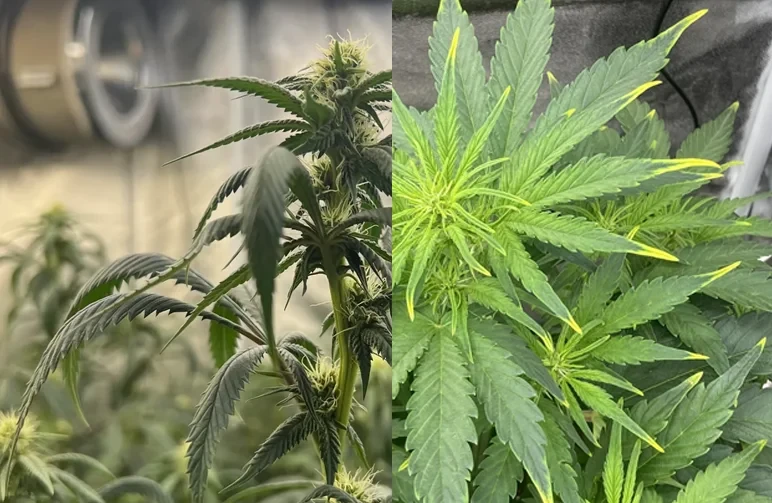
If you see this, you need to act fast.
First, back your nutrient strength down by 50 percent for the next feeding. Second, flush your pot. Pour plain, pH-balanced water through the soil until a good amount runs out the bottom.
This washes the excess salt away from the roots.
The burnt tips will not heal, but do not panic. As long as you lower your dose, the new growth will look perfect.
Frequently Asked Questions
I get a lot of the same questions from new growers. Let's clear up a few common concerns so you can feed your plants with confidence.
Do I need to use Cal-Mag with autoflowers?
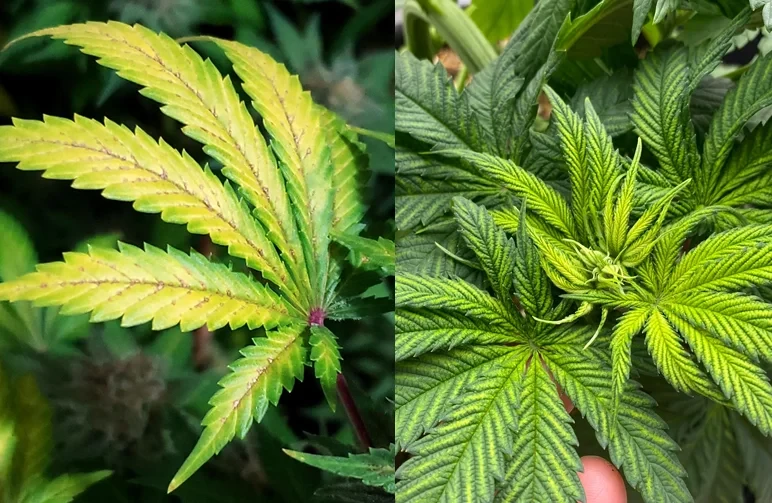
Yes, you usually do. Calcium and Magnesium are vital for plant health. If you are growing in coco coir, or if you are using Reverse Osmosis (RO) water, you absolutely must add a Cal-Mag supplement to every feeding.
Coco naturally absorbs Calcium, so you have to replace it.
How often should I feed my autoflower?
If you grow in soil, never feed your plant every single time you water it. The soil will hold onto the salts and burn the roots. A good schedule is to feed the plant, let the pot dry out, and then give it plain water the next time.
If you grow in coco coir, you need to feed the plant a light dose every single time you water.
Can I use regular tomato food?
You can, and the plant will survive. But cannabis specific nutrients are formulated for the exact needs of weed plants.
If you want dense, sticky, absolute banger buds, spend the extra money on a real cannabis nutrient line.
The Wrap Up
Autoflowers reward precision and they punish heavy hands.
If you remember one thing from this guide, let it be this. Less is always more. Start with a light dose, keep your pH in the correct range, and only increase the food when the plant looks hungry.
If you follow this schedule and master the basics of how to grow autoflowers, you will pull some incredible, top-shelf flowers on your very first run. Buy some good genetics, mix your water carefully, and enjoy the harvest.