Short on space and not exactly flush with cash, but still want to get in on the whole homegrown weed phenomenon? Or maybe you're interested in learning about cannabis cultivation techniques but want to start small before you invest a load of money in expensive, complicated equipment.
Either way, a 'Space Bucket grow' could be ideal.
What is the Space Bucket method?
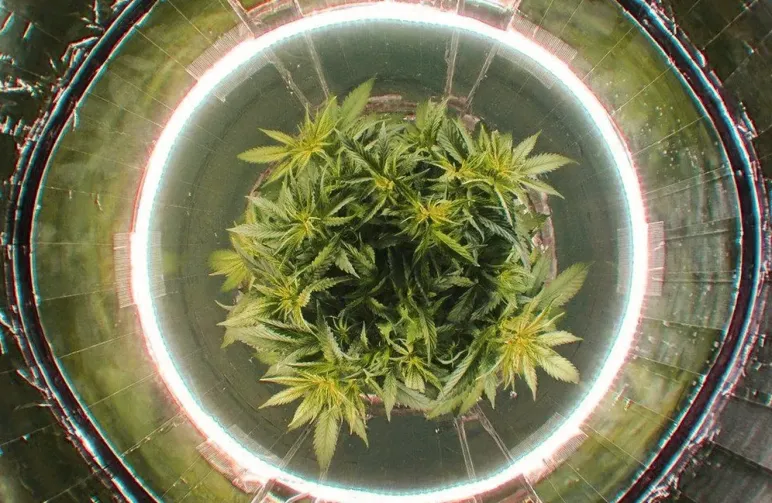
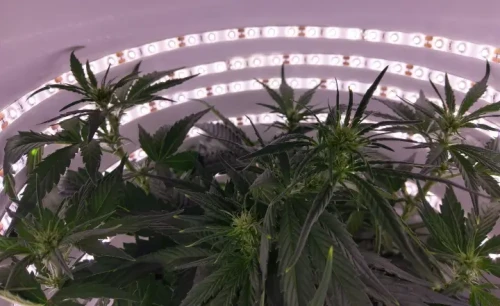
In a nutshell, the Space Bucket method is a self-made indoor gardening system. Picture stacking a few 20-liter (5-gallon) buckets together, tricking them out with grow lights, fans, and some reflective lining - voilà, you've got yourself a bunch of Space Buckets to grow cannabis!
Now, what's the real magic of a Space Bucket? Well, it lets you control every aspect of your plant's environment. Want to grow herbs in winter? No problem.
Can't get enough of your own homegrown buds? Grow them all year round. Small space is no issue here - it's perfect for apartment dwellers or anyone with limited room to grow weed.
Sounding good so far? Then, keep reading for our lowdown on how to establish a thriving Space Bucket setup of your very own.
What do you need for a Space Bucket grow?
OK, so if you're sold on the idea of setting up a Space Bucket weed growing system in your home, the first thing you're going to need to do is get hold of the necessary equipment, tools, and materials. You'll need:
- Weed seeds suitable for Space Bucket grows.
4 x 20-liter (5-gallon) buckets with lids
6 x 23-watt mains powered lights
2 x 24-hour timer switches
Reflective material (e.g., kitchen foil or white paper)
Gaffer tape
Growing soil
Glue or double-sided (duct) tape
Hairdryer with a latching on/off switch
Ducting pipe - A length of 6.3 cm (generally sold as 63 mm)
PC (exhaust) fan plus power supply
Plant pot
Round plastic tray which is wider in diameter than the buckets and at least 10 cm (4 inches) in height
Power strip
Circuit breaker
Cordless drill
Retractable blade knife
Metric ruler and compass set
Pencil
As mentioned above, there's nothing particularly specialist involved, and anything you don't already have to hand will be easily available from your local home store. So that's a relief!
If you want to use multiple Space Buckets to grow cannabis plants, make sure to plan accordingly.
How to grow in a Space Bucket?
Now that you've collected all the essentials, simply follow the steps below:
Using the retractable blade knife, remove the bottom third of one of the buckets (note: keep hold of the bottom section of the bucket, as you will need it later).
Push another of the buckets through the now bottomless bucket and secure it in place using the gaffer tape, creating a taller bucket. Alternatively, a taller bucket with the same diameter at the top can be used.
Drill several 5 mm (0.2 inches) holes in the bottom of the taller bucket.
Place another bucket inside the taller bucket.
In the center of one of the bucket lids, draw a circle around the rim of the plant pot.
Draw a second circle about 5 mm inside the first circle, and cut around this using the retractable knife (this will be used to hold the plant pot in place).
Drill a sufficient number of 5 mm holes around the lid to allow air to circulate through it.
Place the lid onto the top bucket, and secure the plant pot in the central hole (at this stage you can choose to plant your seed, however, you might prefer to do this once your Space Bucket is complete).
On the side of the taller bucket, draw a square around the PC fan.
Using the retractable knife, cut around the square and use the resulting hole to fit the PC fan to the side of the taller bucket.
Retrieve the bottom third of the bucket mentioned at the beginning of these instructions. Draw a straight (horizontal) line around its circumference about 6 cm (2.4 inches) from the bottom.
Using the retractable knife, cut around the line.
Remove the base of the section of the bucket, resulting in a 6 cm high plastic ring.
Using the retractable knife, cut several small notches along the bottom edge of the 6 cm high plastic ring (this will allow water to flow into your water collection container).
Place the 6 cm high plastic ring into the round plastic tray (this will be your water collection container, a.k.a. drip tray).
Drill plenty of 5 mm cm holes in another bucket lid, and place it on top of the 6 cm high plastic ring. Congratulations, you have now created a stand for your Space Bucket!
Place the taller bucket containing the standard-sized bucket, etc., onto the stand.
With the lid removed, turn your remaining bucket upside down.
Using the retractable knife, cut a circular hole 6 cm in diameter in the center of the base of your remaining bucket.
Cut a further six holes of a size suitable to hold the 23-watt mains powered lights around the central 6 cm hole.
Using glue or double-sided tape, line the inside of this bucket with reflective material.
Attach one end of the ducting pipe to the nozzle of the hairdryer using gaffer tape, then fit the other end to the central 6 mm (0.2 inches) hole in the base of the bucket mentioned in the preceding step.
Fit the 23-watt mains-powered lights into the surrounding holes.
Cut a small hole at least 4 cm (1.6 inches) in diameter in the side of the upturned bucket (this will be used to water and feed your plant, and should be covered using gaffer tape when not in use).
Place the upturned bucket on top of the lower half of your Space Bucket, which you assembled earlier.
More tips for your own Space Bucket grow
As you'll no doubt agree, that's more than enough steps for now! Your Space Bucket should now be complete if everything goes according to plan. It's now time to plant your weed seeds if you haven't done so already and connect the electrical components using the power strip via the circuit breaker.
You'll also need to use the timer switches to set the frequency of light and hot air. This should be adjusted according to the needs of the particular weed variety you have chosen (more on that subject in just a minute), and the capabilities of your equipment.
And remember, keep that hairdryer on a low setting, and only use it in short bursts to avoid burnout!
Correctly monitoring your Space Bucket as your seeds grow toward maturity will require some fairly detailed research. As always, it is essential to ensure that your plant is watered regularly (not forgetting to empty that water collection container), and given plenty of light and nutrients.
Precisely how you water and feed your plant via the described gaffer tape-covered hole will involve a degree of creativity. However, if you can't source a suitable funnel, spray, or miniature watering can, as a last resort, you could always simply carefully remove the top half of your Space Bucket when tending to your plant before replacing it once finished.
Don't plant directly into your Space Bucket. Pop your plant into a separate container first - it's a game-changer. This way, you can easily whisk it out anytime without a fuss. This will also keep your Space Bucket cleaner, ready for the next green-thumb adventure the moment one harvest wraps up. You'll thank us when you start your next grow.
One final note: using the circuit breaker will go some way towards ensuring that your Space Bucket setup is safe, but it is nonetheless essential that you take sensible steps to ensure that you are fully protected.
Your setup is your responsibility, after all, so ask a more experienced grower for advice. And if you are not fully confident, you can always return to the drawing board or even purchase a professionally made alternative.


