As home cultivation becomes more accessible under evolving cannabis laws, selecting the right feminized seeds is one of the first, and most important, decisions you’ll make as a new grower. Choosing wisely can mean the difference between a frustrating learning curve and a harvest you’re proud to share. In this guide, we’ll break down what makes feminized seeds ideal for beginners, how to identify strains that forgive early mistakes, and which factors (climate, space, genetics) should guide your choice. By the end, you’ll have a clear roadmap for picking seeds tailored to your environment, experience level, and goals.
Why Feminized Seeds Matter for Your First Grow
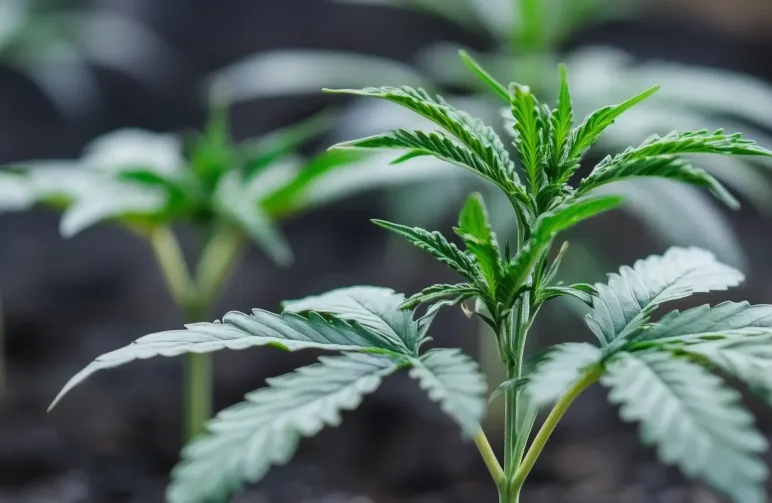
Feminized seeds have been bred to produce only female plants, the ones that develop the resinous buds prized for consumption. With regular seeds, you face a roughly 50:50 chance of male plants, which, if left unchecked, pollinate females and dramatically reduce bud quality and yield. By starting with feminized seeds, you eliminate the gamble of unwanted males and focus on cultivating the plants that deliver the flower you set out to grow.
Key Advantages of Feminized Seeds:
Guaranteed Flowering Potential: Every seed you pop has the capacity to develop into a bud-producing female.
Simplified Grow Process: You don’t need to monitor for male pre-flowers and remove them, reducing both stress and labor.
Optimized Space and Resources: Every plant in your tent or garden contributes to your harvest, instead of wasting light, nutrients, and space on males.
If your primary objective is to learn the basics of cultivation and achieve a harvest without unnecessary setbacks, feminized seeds remove one of the biggest early hurdles.
Defining “Beginner-Friendly” Genetics
When authors talk about beginner-friendly strains, they mean plants that demonstrate three core traits: resilience, adaptability, and predictable lifecycle. As someone new to growing, you’ll appreciate varieties that
Tolerate minor fluctuations in temperature or humidity,
Recover quickly if you overwater or underfeed, and
Reach harvest in a reasonable timeframe so you’re not waiting half a year just to see progress.
In practical terms, you want seeds whose parent strains are well-established in home cultivation circles. These parents have been through multiple generations of selective breeding, making them both sturdy against pest or mold pressure and unlikely to surprise you with unexpected stretching, hermaphroditism, or other unwanted quirks.
Characteristics to Look For in a Beginner Strain
Environmental Forgiveness: Can handle a ±5 degrees swing overnight or a brief period of higher humidity without falling prey to mold.
Compact Growth Habit: Doesn’t shoot up 200 cm indoors if your ceiling is only 150 cm high.
Predictable Flowering Time: Finishes in 8–10 weeks of bloom rather than stretching to 12+ weeks.
Resistance to Common Problems: Low susceptibility to powdery mildew, spider mites, or nutrient-lockout symptoms.
In essence, these strains act more like domesticated garden vegetables, hardy, straightforward, and unlikely to “throw a tantrum” if you miss a watering or two.
Comparing Three Classic “Go-To” Strains
Below are three of the most time-tested, forgiving strains for first-time growers. Each has a distinct growth profile and finishing time, so match them to your space and patience level.
1. Northern Lights feminized (Indica-Dominant)
Why It’s Beginner-Friendly: Short, bushy stature (often 100 cm indoors); very resistant to mold and bud rot; minimal nutrient demands.
Flowering Time: Approximately 7–9 weeks.
Indoor vs. Outdoor: Ideal for small tents, closets, or even a dedicated cabinet. Outdoors, it completes before autumn rains set in (in many moderate climates).
Typical Yield: Moderate for an indica (around 400 gram per square meter indoors), but quality is consistently good.
Cannabinoid Profile: Often lands between 16–18% THC; known for a calming, sedative effect.
2. Blue Dream Photoperiod Seeds (Sativa-Dominant Hybrid)
Why It’s Beginner-Friendly: Balanced hybrid vigor means it recovers quickly from stress; tolerant of higher humidity; robust root systems.
Flowering Time: Around 9–10 weeks.
Indoor vs. Outdoor: Indoors, you’ll need at least a 120 cmx120 cm footprint to accommodate its 100 cm-120 cm height (unless you employ topping/LST). Outdoors, it can stretch to 150 cm or more, so give it room.
Typical Yield: Generous, up to 550 gram per square meter indoors; outdoors, 1–2 pounds per plant in ideal conditions.
Cannabinoid Profile: Often 17–20% THC; uplifting and euphoric, making it popular for daytime use.
3. White Widow Feminized Seeds (Balanced Hybrid)
Why It’s Beginner-Friendly: Explosive resin production; hardy against pests and light nutrient fluctuations; compact to medium height.
Flowering Time: Roughly 8–9 weeks.
Indoor vs. Outdoor: Finished plant height is typically 100 cm indoors; can handle less intensive lighting setups. Outdoors, it blossoms before the first frost in many temperate regions.
Typical Yield: Moderate to high, around 400 gram per square meter indoors.
Cannabinoid Profile: 18–22% THC; balanced uplifting and relaxing effects, making it a “crowd-pleaser.”
These three strains have long track records among both novice and seasoned growers, so you can be confident in their genetic stability and overall resilience. If you’re buying from a reputable seed bank (e.g., Seed Bank A, Seed Bank B), you can usually find high-quality feminized seeds of these classics without worrying about inferior or mislabeled genetics.
Matching Your Strain to Your Growing Environment
Even the sturdiest strain can flop if the local climate or grow space isn’t a good fit. Before you click “add to cart,” consider:
Indoor vs. Outdoor Cultivation
Indoor: You control light cycles, humidity, and temperature (within reason). Compact, high-yielding indicas or hybrids work best.
Outdoor: You’re subject to the local seasons. In humid areas (e.g., Pacific Northwest), pick mold-resistant strains like Northern Lights or Durban Poison; in hot, dry regions (e.g., Southern California), classic Kush varieties thrive.
Available Space and Light
Small-Scale (e.g., Closet or Cabinet): Indica-dominant strains (shorter, bushier) are ideal. Look for “dwarf” or “auto” versions if turn-key stealth is a priority.
Medium-Scale (e.g., 120 cmx120 cm Tent): Sativa-dominant hybrids like Blue Dream can excel if you use low-stress training (LST) or topping to manage height.
Large-Scale (e.g., 300 cmx300 cm Room or Outdoor Plot): You have the flexibility to try multi-strain setups. Just ensure your ventilation, lighting wattage, and nutrient plan keep up with a bigger canopy.
Local Weather Patterns (for Outdoor)
High Humidity (above 65% average): Prioritize mold-resistant varieties, Northern Lights, White Widow, or certain Durban lineages. Keep an eye on late-season rains; schedule harvest before peak moisture.
Hot, Arid Summers: Kush landrace strains (e.g., Afghan Kush, OG Kush fem seeds) handle heat spikes well but need consistent watering schedules. Use mulch or ground cover to retain soil moisture.
Cool, Short-Season Climates: Auto-flowering feminized seeds finish faster (8–10 weeks from seed to harvest) and are less photoperiod-dependent, great for regions with early autumns.
Germination and Early-Stage Success: Setting Yourself Up Right
Even a bulletproof seed can get chewed up if it doesn’t pop properly. Here’s a quick checklist for a high germination rate:
Choose a Reputable Seed Bank
A good seed bank will guarantee at least 80–90% germination; some offer free replacements if a seed fails to sprout.
Look for banks that specialize in feminized seeds and provide germination guides.
Use the Paper Towel Method (or Starter Plugs)
Place seeds between two damp paper towels, inside a sealed (but vented) plastic baggie. Keep at 70–75°F; check daily.
Transfer sprouted seeds to starter cubes or gentle soil once you see a taproot (~4–7 days).
Plant at the Correct Depth
About ¼-inch below the surface of a moist (not soaked) seedling medium. Lightly cover the seed; avoid compacting the soil above it.
Maintain Humidity and Warmth
Seedlings thrive at 70–80% humidity and 21 °C-24 °C. A small humidity dome or gentle misting can help until leaves unfurl.
Starting strong not only gives you confidence, it also reduces the chance of losing seeds to damping-off or other early-stage complications.
Leveraging Community Support and Knowledge
You don’t have to figure this out alone. Every grower (even pros running multiple pounds per harvest) started somewhere. Tap into resources like:
Online Forums (e.g., GrowDiaries, Reddit r/microgrowery): Search user grow logs for your chosen strain, see photos, note common mistakes, and learn ideal feeding schedules.
Local Grower Groups: If your jurisdiction permits, join a club or co-op; firsthand experience from neighbors can alert you to region-specific pitfalls (e.g., local pests, water pH quirks).
YouTube Channels & Podcasts: Many experienced growers post “strain comparison” videos where they run side-by-side grows, look for ones focusing on beginner builds.
Community advice can guide you through small (but critical) details: pH targets for vegetative feeding, how to prune fan leaves without shocking the plant, or how to spot early signs of nutrient lock-out.
Conclusion: Actionable Steps to Get Started Today
By choosing feminized seeds from tried-and-true genetics and matching strains to your space and climate, you considerably lower the learning curve. Here’s your step-by-step plan:
Assess Your Grow Space & Climate:
Measure your tent/room dimensions and note average seasonal temps/humidity if growing outdoors.
Select One of the Classic Beginner Strains:
Northern Lights for compact indoor grows or mold-prone climates.
Blue Dream for balanced yields and hybrid vigor in medium spaces.
White Widow for a reliable finish and moderate size.
Order from a Reputable Seed Bank:
Verify their feminized guarantee and germination policy (e.g., replacements if <80% germination).
Germinate Using the Paper Towel Method:
Keep seeds at 22 °C and ~80% humidity until taproots appear, then plant in a gentle seedling medium.
Monitor Closely Through Veg:
Use balanced, mild nutrient solutions (e.g., ¼-strength base nutrients). Keep pH in the 6.0–6.5 range.
If indoors, provide 18–24 hours of light at 200–400 µmol/m²/s; if outdoors, ensure seedlings get morning sun and light afternoon shade.
Transition to Flower Once You Have 4–6 Nodes:
Switch to a 12/12 light schedule indoors, or simply let photoperiod strains turn naturally outside.
Increase phosphorus and potassium slightly to support bud development.
Throughout this process, lean on grow-log resources and community feedback. Keep notes on watering frequency, nutrient schedules, and any pest observations. By the time you approach harvest (8–10 weeks after flowering), you’ll have a solid dossier on how your chosen strain performs in your setup, information you can carry forward into your next grow.
Growing your first plants from feminized seeds doesn’t need to be a leap into the unknown. With well-bred, forgiving genetics and a clear understanding of your own environment, you’ll unlock the satisfaction of a successful harvest, and set the stage for every grow that follows.


