We've burned a few pans, dialed in temps, and taste-tested more than we care to admit, so here's our no-BS guide on how to make cannabutter. We'll keep it simple, potent, and repeatable.
Whether you're cooking with leftover material from trimming your cannabis or using top-shelf flower, this walkthrough nails the science (decarb), the art (infusion), and the safety (dosing).
And yes, you'll get options: stovetop, slow cooker, and Instant Pot. After you've spent time harvesting, trimming, drying, and curing your cannabis, are you ready to turn that yield into creamy, green gold? Let's cook.
Key Takeaways
- Decarb is non-negotiable: Bake cannabis at 240–245°F (116 °C–118 °C) before infusing or your butter won't work.
- The Golden Ratio: Use 0.2 oz–0.4 oz of cannabis per 1 cup of butter.
- Add water: Always add water to your stovetop infusion to prevent scorching the butter.
- Never boil: Simmer gently at 160–200°F (71 °C–93 °C). Boiling destroys THC.
- Start low, go slow: Edibles hit harder and last longer. Test a 1/4 teaspoon before serving a whole batch of brownies.
What is Cannabutter and How Does it Work?
The Magic of Infusion: Turning Butter into a Carrier
Cannabutter is regular butter infused with cannabinoids (like THC and CBD) and terpenes. Because cannabinoids are highly fat-soluble, warm butter acts like a sponge.
When heated together, the fat molecules pull the active compounds out of the plant material, creating a potent, spreadable carrier for your edibles.
Why Homemade is Better: Control Over Potency and Ingredients
DIY equals absolute control. You pick the strain, you dictate the potency, and you choose the ingredients. You get to skip commercial additives and tune the strength perfectly to your tolerance.
Plus, it's significantly cheaper and tastes fresher than anything you'll find pre-packaged.
The Single Most Important Step: Decarboxylation
What is Decarboxylation? (From THCA to THC)
Raw cannabis doesn't contain THC; it holds THCA, which is completely non-psychoactive. You could eat a handful of raw flower and feel nothing.
Exposing the plant to gentle heat (typically 240–245°F / 116 °C–118 °C) removes a carboxyl group, converting that dormant THCA into active THC.
This process is called decarboxylation (or "decarbing"), and it unlocks the potency so your cannabutter actually works.
Why You Can't Skip This Step
If you skip the decarb, you'll get weak butter, wasted buds, and sad brownies. Decarb first, always.
Even if you're using autoflowers or incredibly frosty photoperiods, we stick to a low-and-slow bake to protect the delicate terpenes and cannabinoids from vaporizing.
Gathering Your Ingredients & Equipment
Having the right tools ready prevents mid-recipe panic. Here is exactly what you need.
Ingredients You'll Need
- Cannabis:0.2 oz–0.4 oz of flower (or 0.5 oz–0.7 ozof trim). Potency scales with flower strength, so choose wisely.
- Butter:1 Cup (2 sticks).
- Water:1 Cup (if using the stovetop method).
Choosing Your Cannabis (Flower, Trim, or Shake?)
All work perfectly. Flower yields the strongest, most flavorful butter. Using trim, shake, or leftover sugar leaves and stems is incredibly budget-friendly and great for making big batches without dipping into your top-shelf stash.
Whatever you use, ensure you properly store your cured buds for long-term freshness and potency prior to cooking—starting with perfectly preserved, dry material is essential for a clean flavor.
What is the Best Butter for Weed Edibles?
We highly prefer unsalted butter so you can control the sodium in your final baking recipes. Alternatively, clarified butter or Ghee is the absolute best choice.
Ghee has the milk solids removed, meaning it resists heat better, has a higher fat content (to absorb more THC), and yields a smoother, less "grassy" flavor.
Essential Equipment
- Baking sheet & parchment paper (for decarbing)
- Oven thermometer (Ovens lie; this $5 tool saves your THC)
- Medium saucepan or slow cooker
- Fine-mesh sieve AND food-grade cheesecloth
- Heat-safe glass jar or bowl (for storing)
- Digital meat/candy thermometer (to check butter temp)
Grinder vs. Hand-Breaking
Coarse grind only. If you grind it into a fine powder, it will slip right through your cheesecloth, resulting in a bitter, sludgy butter. Breaking it up by hand or giving it two quick pulses in a grinder is perfect.
No coffee-grinder dust clouds, please.
How to Make Cannabutter: The Classic Stovetop Method (Step-by-Step)
Step 1: Decarboxylate Your Cannabis
Decarb sets the stage for potency. Work clean, keep temps steady, and gently stir for even activation.
Preheat Your Oven: Set it to 240–245°F (116 °C–118 °C). Place an oven thermometer inside to confirm the actual temperature.
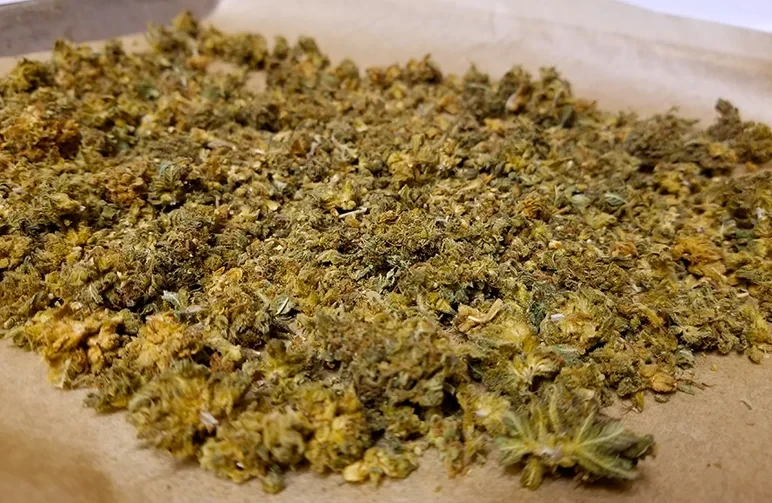
Prepare the Cannabis: Break up the buds. Spread them evenly on a parchment-lined baking tray in a single layer. Tip: Cover loosely with foil to trap terpenes and slightly reduce the smell.
Bake Low and Slow: Bake for 30–40 minutes, gently stirring the buds every 10 minutes to ensure an even toast.
The Visual Cue: You'll know it's done when the cannabis changes from a bright, vibrant green to a toasted, light golden-brown color. Your kitchen will smell distinctly like roasted cannabis.
Step 2: Infuse the Butter
Now we marry the fat and the cannabinoids. Low heat, patience, and a little water keep things silky.
Melt the Butter and Add Water: In a saucepan on low heat, add 1 cup butter and 1 cup water. Melt them together. Why water? Water regulates the temperature and protects the butter from scorching.
It will separate out later, so don't worry about watered-down butter.
Add Your Decarbed Cannabis: Stir in the toasted plant material. Keep everything submerged.
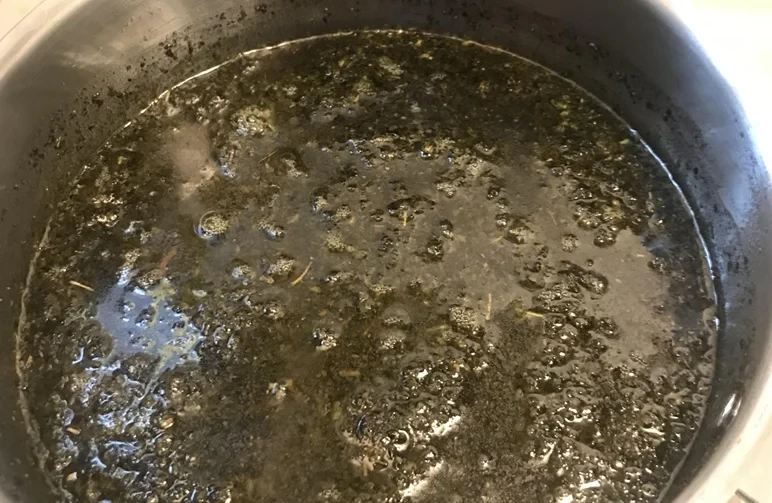
Simmer, Don't Boil: People often ask, how long to boil cannabutter? The answer is never. Maintain a temperature of 160–200°F (71 °C–93 °C) for 2 to 3 hours.
You are looking for a very gentle simmer—just a few tiny bubbles rising to the surface occasionally. If it’s rolling or sputtering, your heat is too high.
Step 3: Strain the Mixture
Straining determines clarity and flavor. Go slow to keep potency in the butter, not the cloth.
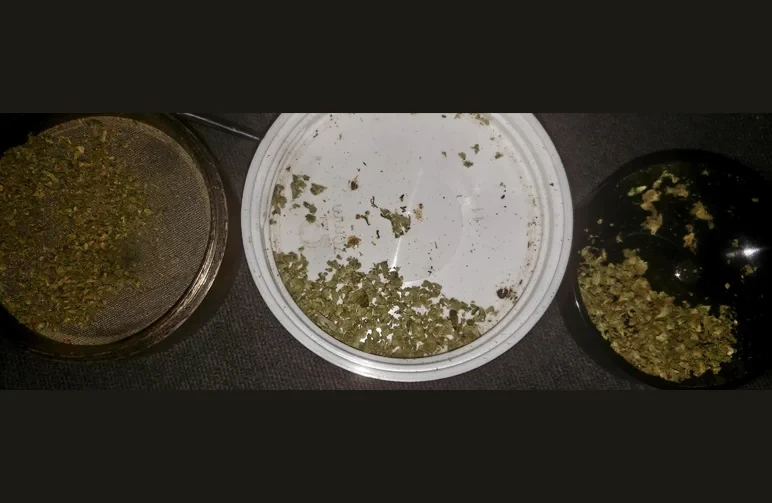
The Double-Strain Method: Place your fine-mesh sieve over a heat-safe glass bowl or jar. Line the sieve with a double layer of cheesecloth.
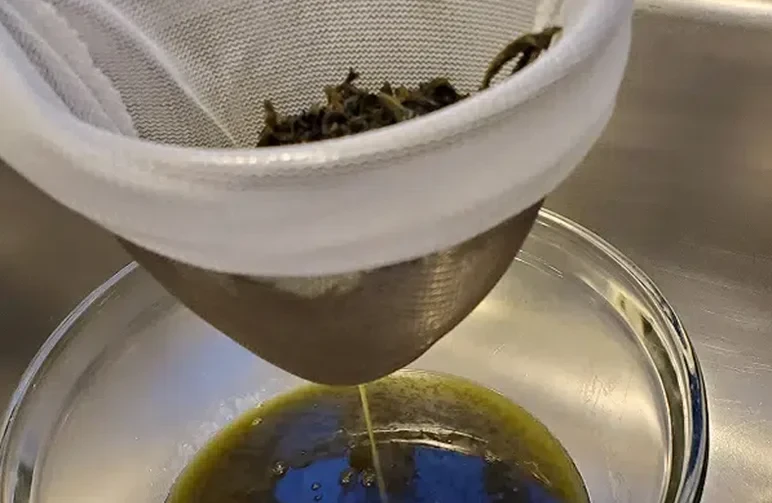
Pour Slowly: Pour the hot mixture into the cheesecloth. Let gravity do the heavy lifting.
To Squeeze or Not to Squeeze? You can give the cheesecloth a very gentle squeeze with some tongs, but do not wring it out hard. Hard wringing forces bitter chlorophyll and plant dust into your finished product, ruining the taste.
Step 4: Cool, Separate, and Store
Set it and chill. Separation gives you clean cannabutter with minimal plant flavor.
Chill: Place the jar in the refrigerator for 4 to 8 hours, or overnight.
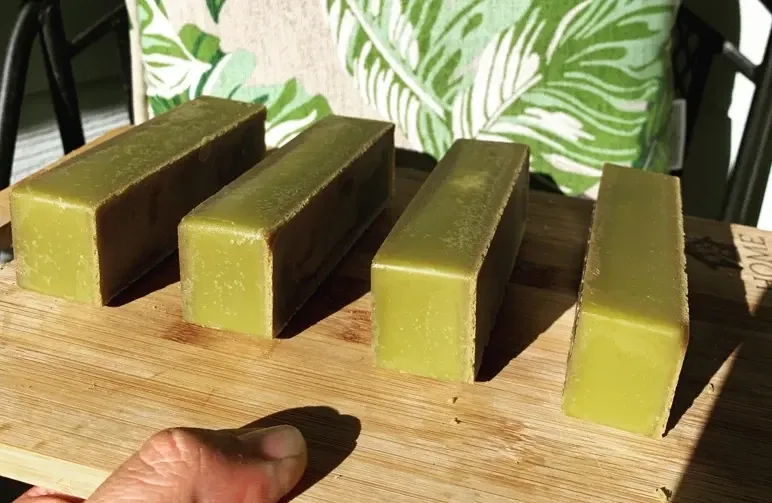
Separate: As it cools, the infused butter will harden into a solid green "puck" at the top, and the excess water will sit at the bottom. Run a knife around the edge, pop the butter puck out, and dump the murky water down the drain.
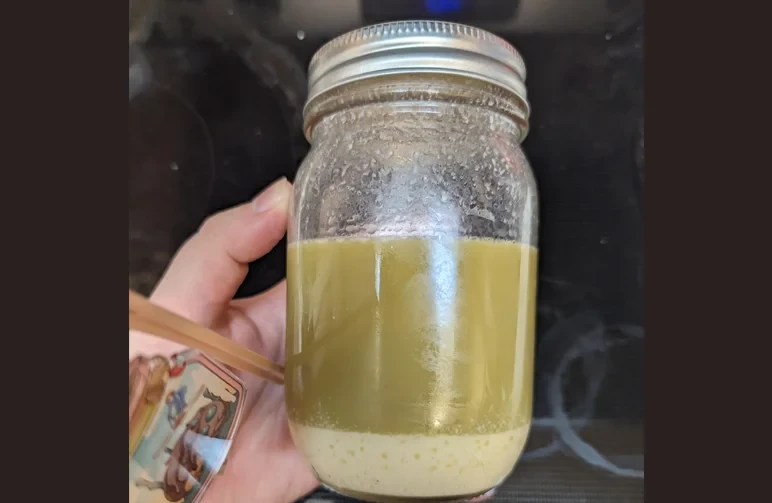
Clean it up: Scrape any mushy, water-logged bits off the bottom of the butter puck for a cleaner taste. Store in an airtight container.
Alternative Infusion Methods (For Every Kitchen)
Don't want to stand over a stove? Try these hands-off methods. (Note: You must still complete Step 1: Decarb before using these methods).
The "Set It and Forget It" Slow Cooker (Crock-Pot) Method
Great for big batches. The low heat is incredibly forgiving, and your stirring arm gets a break.
How to do it: Add your butter, a splash of water, and your decarbed cannabis to the slow cooker.
Settings: Set to Low (which usually hovers around 170–190°F / 76 °C-87 °C). Cover and let it infuse for 3 to 4 hours, stirring occasionally. Strain and cool as normal.
The Fast & Efficient Instant Pot Method
Ideal for a cleaner kitchen and less smell. We "jar-infuse" to keep water out of the butter entirely and keep the odors trapped.
How to do it: Combine the butter and decarbed cannabis inside a heat-safe Mason jar. Screw the lid on finger-tight (do not crank it down tightly, or the glass could shatter).
Settings: Place the trivet in the Instant Pot and add 2 cups of water to the main pot. Place the jar on the trivet.
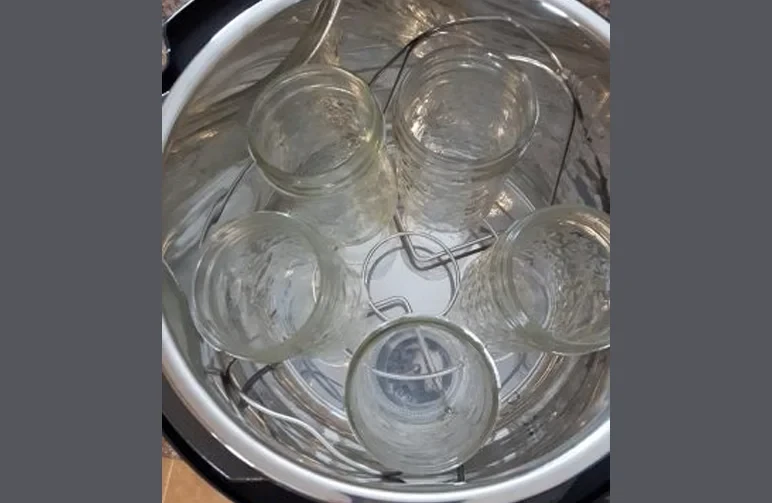
Secure the lid, set the valve to "Sealing," and cook on Manual / High Pressure for 30 to 40 minutes.
Release: Let the pressure release naturally for 20 minutes. Carefully remove the hot jar, strain, and chill.
Dosing Your Cannabutter: A Guide to Potency & Safety
🚨 WARNING: Edibles Affect Everyone Differently 🚨
Edibles are processed by your liver, converting Delta-9 THC into 11-Hydroxy-THC, which is significantly more potent. Onset can take 30 to 120 minutes, peak at 2–4 hours, and linger for 8+ hours.Set and setting matter. Never drive. If you overdo it: hydrate, find a safe place to rest, chew on some black peppercorns (it helps counteract anxiety), and simply wait it out.
How to Estimate Your Cannabutter's Potency
We use a quick math check to avoid surprises. It's an estimate (lab tests are king), but it keeps batches consistent across bakes.
Step 1: Calculate Total THC Potential
(Formula: Grams of cannabis x 1,000 = total milligrams. Multiply by THC percentage).
- Example: 0.2 oz of cannabis at 20% THC.
- 0.2 oz x 1,000 = 7,000mg.
- 7,000mg x 0.20 = 1,400 mg Total Potential THC.
Step 2: Account for Infusion Loss
Home infusions are never 100% efficient. Expect about a 70% extraction rate.
1,400 mg x 0.70 = 980 mg THC in your batch of butter.
Step 3: Calculate Per Tablespoon
1 cup of butter = 16 Tablespoons.
980 mg ÷ 16 Tbsp = ~61 mg of THC per Tablespoon.
Quick Reference Dosing Chart
(Assuming a 70% extraction efficiency into 1 Cup of Butter)
| Flower Amount | Estimated THC % | Total Est. mg in Batch | Est. mg per Tablespoon |
|---|---|---|---|
| 0.2 oz | 15% THC | ~735 mg | ~45 mg |
| 0.2 oz | 20% THC | ~980 mg | ~61 mg |
| 0.4 oz | 15% THC | ~1,050 mg | ~65 mg |
| 0.4 oz | 25% THC | ~1,750 mg | ~109 mg |
The Golden Rule: Start Low and Go Slow
If you are new to edibles, a standard starter dose is 2.5 mg to 5 mg of THC. Eat your edible, wait at least 2 hours, and evaluate. Tolerance builds quickly, but patience saves parties.
How to Test Safely: Spread 1/4 teaspoon of your new butter on a piece of toast. Note the effects over 2–3 hours. Adjust your future recipe ratios accordingly!
Frequently Asked Questions (FAQ)
How much cannabutter does one ounce of cannabis make?
We usually pair 1 oz (1 oz) of flower with 3 to 4 cups of butter, depending on your target potency. Our daily-driver recipe for highly potent butter is 1 oz to 3 cups of clarified ghee.
How long does cannabutter last in the fridge? What about the freezer?
Stored in an airtight mason jar, it will last up to 3–4 weeks in the fridge. In the freezer, it will last 3–6 months. Always keep it away from light and air.
Crucial: Label it clearly with the date, strain, and estimated mg per tablespoon to protect unsuspecting roommates.
How do I get rid of the strong cannabis smell while cooking?
Use a lid on your saucepan, run your stove vent/HEPA filter on high, and consider the Instant Pot Mason jar method, which is virtually odorless. Tenting your decarb tray with foil also tames the aroma without cooking the terps off.
My cannabutter isn't strong enough. What did I do wrong?
The most common culprits are:
- You didn't decarb long enough or at a high enough temperature.
- You boiled the butter, destroying the THC.
- You used too much butter for the amount of cannabis you had.
Can I use the leftover plant material (the "sludge") for anything?
Yes, the "spent" mash still holds trace cannabinoids. You can dry it out and bake it into low-dose savory crackers, or steep it in milk for a weak, earthy chai tea. Expect very mild effects.
The Perfect Cannabutter Recipe
Recipe Title: The Perfect Cannabutter (Stovetop Method)
Description: A foolproof, step-by-step recipe for potent, clean-tasting cannabis-infused butter.
Prep Time: 10 minutes
Cook Time: 3 hours 40 minutes (includes decarb)
Cooling Time: 4 hours
Yield: 1 Cup of Cannabutter
Ingredients:
- 0.2 oz to 0.4 oz of Cannabis Flower (coarsely ground)
- 1 Cup Unsalted Butter (or Ghee)
- 1 Cup Water
Instructions:
Decarb: Preheat oven to 240°F (116 °C). Spread coarsely ground cannabis evenly on a parchment-lined baking sheet. Bake for 30–40 minutes, stirring occasionally, until golden brown.
Melt: In a medium saucepan on low heat, combine 1 cup of butter and 1 cup of water until melted.
Simmer: Stir the decarbed cannabis into the melted butter mixture. Maintain a gentle simmer at 160–200°F (71 °C–93 °C) for 2 to 3 hours. Do not let it boil.
Strain: Line a fine-mesh sieve with cheesecloth over a glass bowl. Slowly pour the hot mixture through. Lightly press the plant material with tongs, but do not wring it out hard.
Cool: Place the bowl in the refrigerator for 4-8 hours until the butter forms a solid green puck on top of the water.
Store: Remove the solid butter puck, discard the leftover water, and store the cannabutter in an airtight container in the fridge.
Final Thoughts
Make it simple, keep it low-and-slow, and track your doses. If you're still growing your next batch, choose strains you love eating—think gassy OGs for rich brownies, or citrusy sativas for lemon bars.
Looking for elite genetics to grow your own ingredients? Explore our curated lineup at Weedseedsexpress.


