We've all been there. A grow that looked picture-perfect, only for the final smoke to be harsh, grassy, and disappointing. Nine times out of ten, the culprit wasn't the light or nutrients—it was the dry and cure.
This final stage is where good cannabis becomes great. It’s the art and science of stabilizing cannabinoids, awakening terpenes, and transforming a sticky harvest into a smooth, flavorful, and potent experience.
Get it right, and you unlock the true genetic potential of your flower. Get it wrong, and all your hard work in the grow tent goes up in smoke—literally.
In this guide, we're sharing the exact, no-fluff process we use to produce top-shelf results every time. We'll cover the essential tools, ideal settings, and a step-by-step walkthrough.
This is the definitive path to a perfect post-harvest.
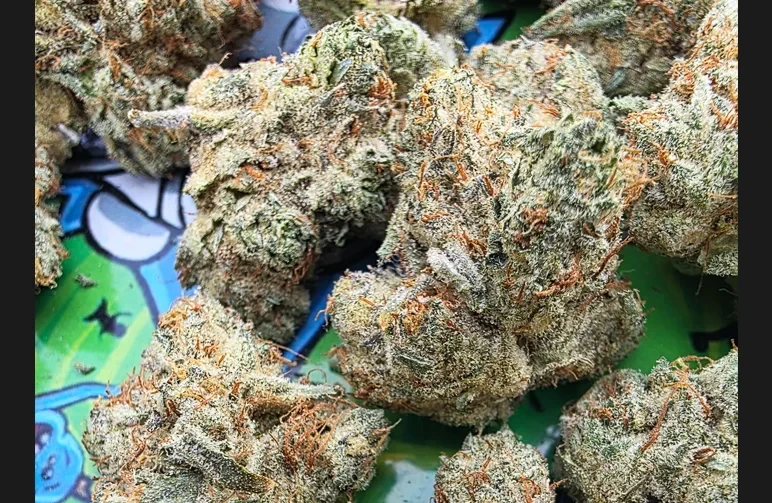
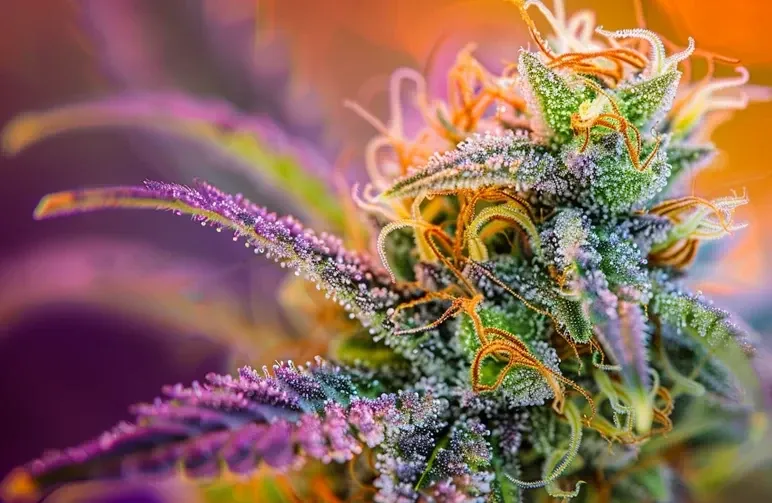
Photo courtesy of u/Due_Reading5487 via Reddit.
Key Takeaways
- Go Slow and Cool: The best results come from a slow, cool, and controlled process. This preserves cannabinoids and terpenes, while hot, fast drying can strip 38–95% of monoterpenes and create harsh smoke.
- Dial in Your Room: Set your dry room to 59–70°F with 45–55% RH. Keep it dark with gentle, indirect airflow.
- Snap, Then Jar: End the drying phase when smaller stems give a clean "snap." Jar the buds when they are 70–80% full and use mini hygrometers to target 58–62% RH inside the jars.
- Burp Religiously: Burp jars 1–2 times daily in week one, then taper off. Vent jars if the RH rises above 65–70%.
- Store for Success: Store finished cannabis sealed in the dark at 60–70°F with 55–62% RH to maintain quality for 6–12 months.
Drying & Curing At a Glance
| Phase | Temperature | Humidity | Duration | Key Goal |
|---|---|---|---|---|
| Drying | 60-70°F (59 °F-69.8 °F) | 45-55% RH | 7-14 Days | Remove bulk moisture until stems snap. |
| Curing (Week 1) | 60-70°F (59 °F-69.8 °F) | 58-62% RH (in jar) | 7 Days | Equalize moisture; Burp 1-2x daily. |
| Curing (Week 2+) | 60-70°F (59 °F-69.8 °F) | 58-62% RH (in jar) | 2-8+ Weeks | Develop flavor/aroma; Burp every few days. |
| Long-Term Storage | 60-70°F (59 °F-69.8 °F) | 55-62% RH (in jar) | 6-18 Months | Preserve quality and prevent degradation. |
Why Proper Drying and Curing is the Most Critical Post-Harvest Step
What Happens if You Skip This Process?
Cut corners here and you'll feel it in your throat and your stash jar. Fast or sloppy drying leaves moisture locked in the core of the buds. This moisture eventually creeps back out, inviting microbes and mold.
Skip curing, and you lock in chlorophyll, giving your smoke a harsh, "fresh-cut hay" taste instead of the cultivar's true terpene profile.
We've seen uncontrolled open-air dries leave buds feeling dry on the outside but still wet inside after two weeks—prime real estate for fungal growth.
The Science-Backed Benefits of a Slow Dry and Cure
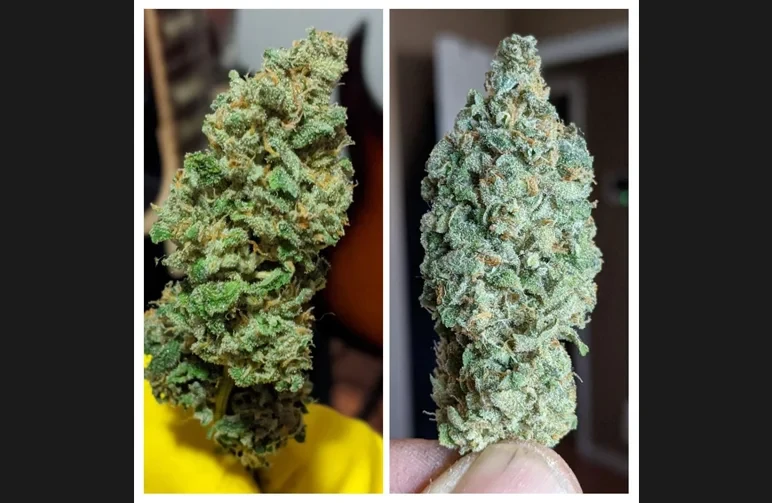
Photo courtesy of u/Heavy420Guy via Reddit.
A slow, cool, and controlled process is non-negotiable for quality. The science is clear:
- Preserves Cannabinoids: Cool-air drying allows cannabinoids like THCA and CBDA to fully develop and stabilize, whereas high heat can cause them to degrade.
- Protects Terpenes: Rushing with hot air can destroy 38-95% of monoterpenes—the volatile compounds responsible for those bright, zesty aromas. A slow dry keeps them intact.
- Improves Smoothness: Curing allows time for chlorophyll and other harsh compounds to break down, resulting in a dramatically smoother smoke that lets the true flavor of the cultivar shine.
Everything You Need: Tools and Equipment for Drying and Curing
For the Drying Phase
- A Controllable Space: A closet, tent, or cabinet that can be sealed from light.
- Environmental Controls: A thermometer, hygrometer, and ideally a controller.
- Temperature Target: 59–70°F (59 °F-69.8 °F)
- RH Target: 45–55%
- Gentle Air Movement: An oscillating fan aimed at a wall, never at the buds.
- Ventilation: An exhaust fan to exchange air and manage humidity.
- Hanging/Racking: Hanging lines, herb drying racks, or whole-plant hooks.
- Pruning Tools: Clean, isopropyl-wiped shears, gloves, and trays.
- (Optional but Recommended): A small dehumidifier/humidifier for tight stability.
For the Curing Phase
- Airtight Containers: Wide-mouth mason jars are the gold standard. Food-grade stainless or UV-blocking jars also work well.
- Mini Hygrometers: One for each jar is essential for accuracy.
- Humidity Packs: 62% or 58% packs are a great safety net, not a crutch.
- A Cool, Dark Storage Spot: 60–70°F (59 °F-69.8 °F), away from heaters and sunlight.
- Labels: For strain, harvest date, and RH readings.
The Complete Step-by-Step Guide to Drying Cannabis
Step 1: Harvesting and Trimming Your Plants
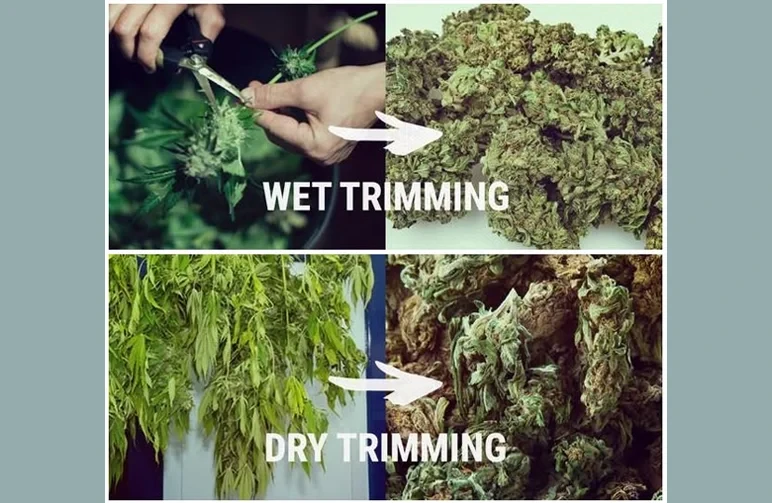
Photo courtesy of u/dontatme420 via Reddit.
Decide your trim style based on your environment.
- If your dry room is dry (RH < 45%): We recommend a dry trim. Cut branches or whole plants and leave the leaves on to slow the drying process.
- If your room is humid (RH > 55%): A wet trim is better. Remove fan leaves and some sugar leaves to reduce moisture and lower the risk of mold.
Always use clean, sharp scissors. To learn more about the perfect harvest window, read our guide on checking trichomes.
Step 2: Setting Up Your Ideal Drying Environment
- Temperature: 59–70°F (59 °F-69.8 °F). Cooler retains more terpenes.
- Relative Humidity: Start at 45–55%. Aim closer to 55% for the first few days, then ease down toward 50%.
- Darkness: Light degrades cannabinoids. Total darkness is crucial.
- Airflow: Gentle and indirect. You want air exchanging, not a windstorm. A slow exhaust fan plus a separate fan bouncing air off a wall is perfect.
Step 3: Hanging or Racking Your Buds
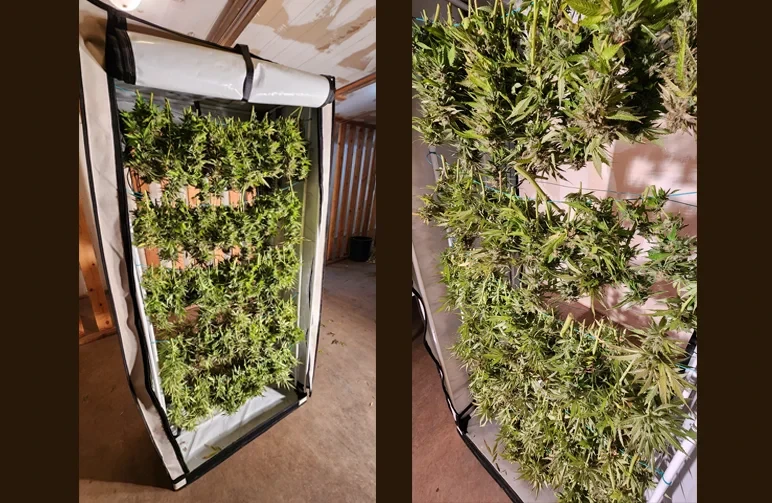
Image courtesy of cannadrytent.com.
Hang whole plants or large branches for the slowest, most forgiving dry. For smaller, wet-trimmed nugs, use mesh racks, ensuring you leave space between buds for airflow.
Check on the environment twice daily for the first 72 hours, as this is when conditions can swing the most.
Step 4: How to Know When Drying is Complete (The "Snap Test")
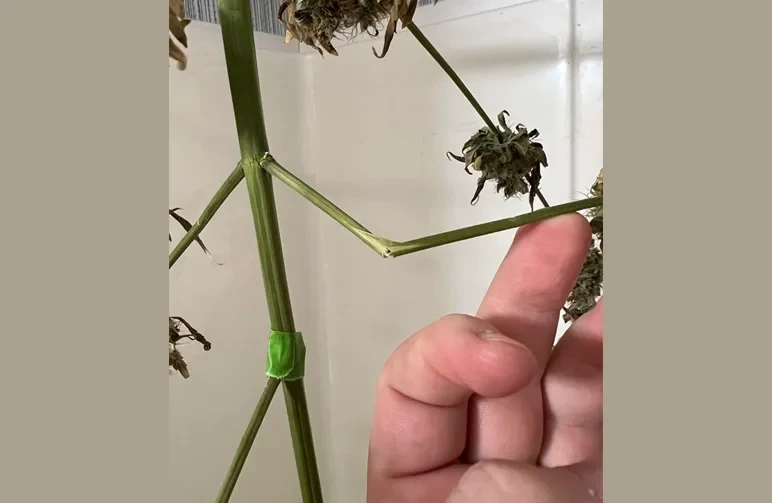
Photo courtesy of u/PrimalShifty9 via Reddit.
The classic method holds true: bend a small-to-medium-sized stem. If it gives a clean, audible "snap" rather than a soft bend, you're ready for jars. The outer buds should feel dry to the touch but not crumble.
In a controlled room, this typically takes 6–10 days. Don't rush it; when in doubt, it's better to jar a little early, as the curing process will balance the moisture.
Mastering the Art of Curing: A Step-by-Step Guide
Step 1: Jarring Your Dried Buds
Once stems snap, buck the buds off the branches. Load your glass jars to about 70–80% full, leaving headspace for air to move. Add a calibrated mini hygrometer to every single jar.
Step 2: The Curing Environment and Target Humidity
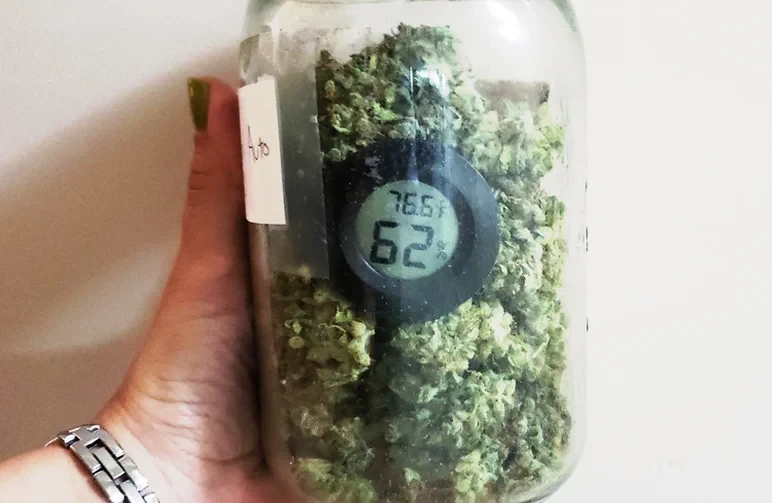
Photo courtesy of Nebula Haze via GrowWeedEasy.com.
Store the jars in a cool, dark place (60–70°F). Your goal is to stabilize the internal humidity of the jars between 58–62% RH.
After 24 hours, check your hygrometers.
- If RH is > 65-70%: The buds are too wet. Leave the lid off for a few hours to let them breathe before sealing again.
- If RH is < 55%: The buds are too dry. You can add a 58% humidity pack to slowly rehydrate them.
Step 3: "Burping" Your Jars for Perfect Curing
"Burping" is simply opening the jars to release moisture and exchange air.
- Days 1–7: Burp 1–2 times daily for 5–10 minutes each time.
- Days 8–14: Burp once every other day as the RH stabilizes.
- Days 15+: Burp once a week or as needed. If the RH is rock-steady at 58-62%, you can seal them for longer.
Step 4: How Long to Cure for the Best Results
- Minimum: 2–3 weeks. You'll notice a significant improvement in smoothness and flavor.
- Sweet Spot: 4–8 weeks. This is where most cultivars reach their peak, with terpenes fully expressing and harshness disappearing.
- Connoisseur Cure: 8+ weeks. Gassy and hashy profiles can become exceptionally deep and complex with a long, stable cure.
Common Mistakes to Avoid When Drying and Curing
- Overdrying Too Quickly: Hot, dry air mummifies the outside of the bud, trapping moisture inside and killing terpenes.
- Not Burping Enough: Forgetting to burp is the #1 cause of moldy buds. If you open a jar and smell ammonia, it means the jar is too wet and needs to be vented immediately.
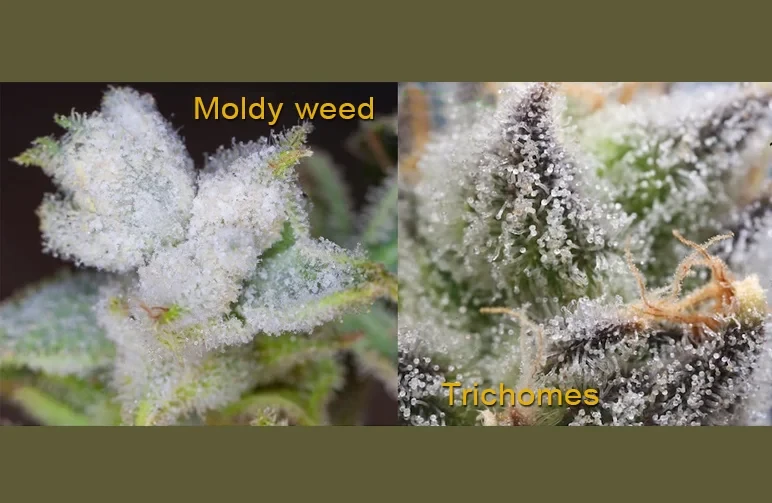
Know Your Frost: A side-by-side comparison of white powdery mildew (left) and healthy, resinous trichomes (right). Mold appears as a fuzzy, web-like coating, while trichomes look like individual crystalline stalks with tiny heads.
Photo courtesy of Lookah via lookah.com. - Using Direct Fans: Direct airflow causes buds to dry unevenly and strips away volatile terpenes. Always keep airflow indirect.
- Using the Wrong Containers: Plastic bags and tubs are not airtight. They will let your buds dry out and can impart a plastic taste. Stick to airtight glass.
Long-Term Storage for Your Cured Cannabis
Best Practices for Maintaining Potency and Flavor
- Store Sealed: Use airtight glass jars with humidity packs to keep the internal RH between 55–62%.
- Keep it Cool & Dark: Store jars at 60–70°F (59 °F-69.8 °F), away from light and heat, which are the biggest enemies of cannabinoids and terpenes.
- Minimize Oxygen: Only open jars when you need to access your flower.
How Long Can You Store Cured Cannabis?
Properly cured and stored flower will easily maintain its quality for 6–12 months. After a year, you can expect some terpenes to fade and a gradual decline in potency.
However, we've had jars kept in ideal conditions that were still delightful well past 18 months.
Frequently Asked Questions (FAQ)
What should my buds smell like during the cure?
In the first few days, they may smell grassy or "green." Within a week or two, the cultivar's true nose—whether citrus, gas, berry, or funk—should start to bloom. An ammonia smell is a red flag for too much moisture.
What if my buds get too dry? Is there a way to rehydrate them?
Yes, but carefully. A 58-62% humidity pack is the best method to slowly raise the moisture content over a few days. Avoid adding orange peels or lettuce, as they can introduce mold.
Remember, you can rehydrate the bud, but you can't bring back lost terpenes.
Can I use a food dehydrator or oven to speed up drying?
Please don't. High heat will destroy your terpenes and degrade cannabinoids, resulting in a fast dry and a flat, harsh product. There are no shortcuts to quality.
What's the difference between drying and curing?
Drying removes the majority of the water from the plant so it can be safely stored without molding.
Curing is the slow, controlled process in an airtight container that allows moisture to equalize and for flavors and aromas to fully develop. Drying makes it safe; curing makes it exceptional.
Conclusion
Dial in these steps, and you'll never look back. The final quality of your smoke is a direct reflection of your post-harvest care.
Before you can get to this stage, you first need to learn how to grow weed indoors. If you want elite genetics worthy of this process, browse our hand-selected feminized strains and autoflower cannabis seeds.
At Weedseedsexpress, we ship fast, back our beans, and are here to help you nail every run, from seed to perfectly cured jar.


