

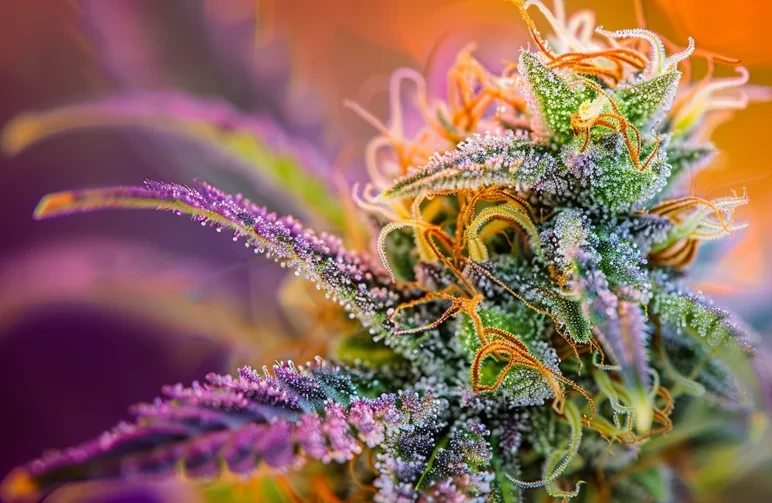
We have all been there. You baby a plant for four months. The buds look frosty and smell incredible in the tent. Then you chop it down, dry it, spark it up, and it tastes like cut lawn grass and burns the back of your throat.
Nine times out of ten, the problem was not your lights or your nutrients. The culprit was a sloppy dry and cure.
This final stage is where good weed transforms into true top-shelf fire. Drying and curing stabilizes your cannabinoids, breaks down harsh green plant matter, and wakes up those loud terpenes.
Get this right, and you unlock the full genetic potential of your harvest. Get it wrong, and all your hard work in the tent goes straight down the drain.
Let me show you the exact, no-fluff process we use in our Amsterdam grow labs to produce smooth, flavourful, and potent buds every single run.
Key Takeaways
- Go low and slow: Fast drying with hot air destroys up to 95 percent of your terpenes. Keep your drying space cool, dark, and steady.
- The stem snap test: Never jar your weed until the small branches give a clean, crisp snap instead of just bending like rubber.
- The sweet spot for jars: Fill wide-mouth glass Mason jars about 75 percent full. Use mini hygrometers to keep the internal humidity between 58 and 62 percent.
- Burp your jars: Open the lids once or twice a day during the first week. This releases trapped moisture and exchanges stale air so mould never has a chance to take over.
Why Drying and Curing Matters (Killing the Hay Smell)
Cut corners here, and you will feel it in your lungs.
When you make that final chop, your buds are stuffed with moisture, starches, and green chlorophyll. If you rush the dry, you trap that chlorophyll inside the flower.
That is what gives bad weed that terrible smell of fresh-cut hay. It turns your smoke harsh, bitter, and hot on your throat.
A slow dry and cure does three big things:
- Preserves your cannabinoids: Cool air gives compounds like THCA time to stabilize so you get the full, hard-hitting potency of the plant.
- Protects your terpenes: Heat is the ultimate enemy of terpenes. Rushing the dry with warm air can destroy up to 95 percent of those delicious aromatic oils. A slow dry keeps the smell loud.
- Makes the smoke like butter: Curing gives natural enzymes time to chew through the harsh chlorophyll and plant sugars. Once those are gone, the smoke turns silky smooth, and the true flavour of the strain finally shines through.
Setting Up the Drying Room: The Golden Rules
You need a clean, enclosed space where you can control the climate. An empty grow tent, a closet, or a dark spare room works great.
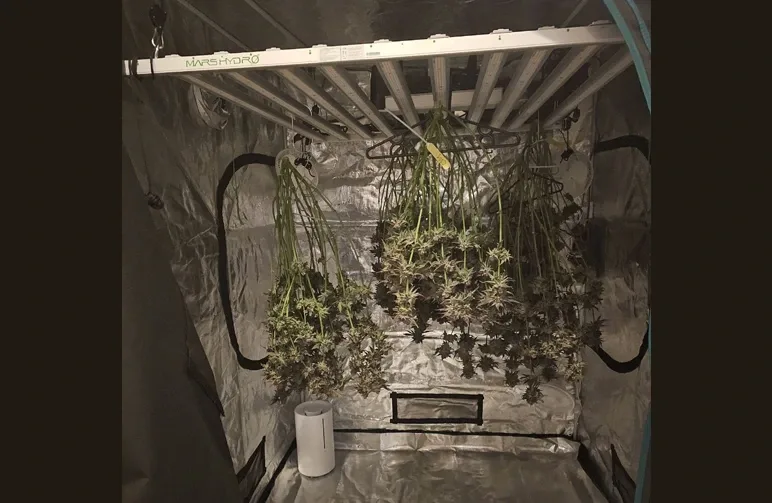
Here are the four golden rules for your drying space.
1. Keep it Cool (Around 60°F / 15°C to 18°C)
Cool air is non-negotiable. Warm air will bake the delicate terpenes right off the buds and dry the outside of the flower way too fast.
2. Lock in Your Humidity (50% to 55% RH)
If the room is too dry, your buds will turn into crispy paper in three days, trapping moisture deep in the core. If the air is too wet (over 60 percent humidity), you are rolling the dice with mould and bud rot.
Keep it steady in that sweet spot.
3. Total Darkness
Light degrades THC and breaks down resin heads. Keep your drying space pitch black for the entire process.
4. Gentle, Indirect Airflow
You must have an exhaust fan running to pull old, humid air out of the space. You can also run a small oscillating fan inside, but you must point it at a wall or the floor. Never point a fan directly at hanging branches.
Direct wind will blow your terpenes away and dry the buds unevenly.
Wet Trimming vs. Dry Trimming
Before you hang your harvest, you have a choice to make. Are you going to trim off the leaves right away, or wait until after the branches are dry?
Both methods work, but they create very different drying speeds.
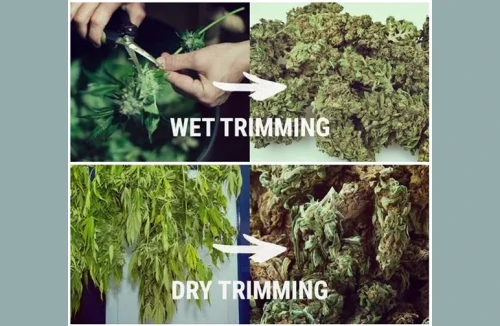
Wet Trimming (Trimming on Chop Day)
With this method, you manicure your buds the second you cut the plant down.
- The Good: Fresh leaves are soft and stick straight out, which makes them much easier to snip off. It also saves space because you lay individual buds flat on mesh drying racks.
If your room is naturally humid (over 55 percent RH), wet trimming strips away extra moisture and lowers the risk of mould. - The Bad: Without leaves to shield them, the buds dry out much faster. That fast dry can trap chlorophyll and leave you with a harsher smoke.
Dry Trimming (The Connoisseur Choice)
With this method, you hang the whole plant or cut large branches, leaving all the leaves attached.
- The Good: This is our favorite method in the lab. As the plant dries, the leaves curl inward around the flowers. This creates a natural shield that slows the drying process way down.
That slow pace protects your precious terpenes and produces the smoothest smoke possible. - The Bad: Dry, shriveled leaves curl tightly around the buds, which makes the final trim take a bit more time and elbow grease.
My Rule of Thumb: If your drying room is humid, do a wet trim to stay safe from mould. If your room is dry, do a dry trim to slow the clock down.
How to Know When Drying is Complete (The Snap Test)
In a properly controlled space, drying usually takes between 7 and 14 days. But throw your calendar away. You must read the plant.
How do you know the exact day your buds are ready for jars? You use the classic stem snap test.
Grab a small to medium-sized branch from your hanging harvest. Slowly bend it in half between your fingers.
- If the stem bends like rubber: Stop right there. The core of the branch is still holding way too much water. Leave the harvest hanging for another day or two.
- If the stem snaps with a clean, audible click: You nailed it. That snap tells you the bulk moisture is gone. The outer buds should feel slightly dry to the touch, but they should never crumble into dust.
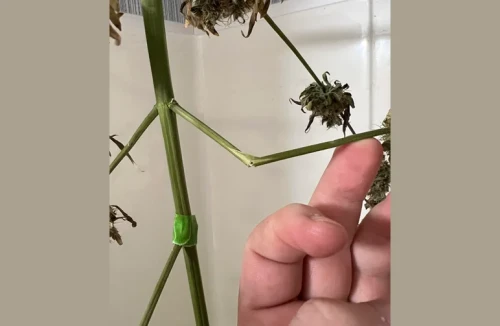
The second those stems snap cleanly, the drying stage is over. It is time to move to the cure.
The Curing Process: Locking in Terpenes
Once your stems pass the snap test, the drying phase is officially over. Now we begin curing.
Curing is the slow, controlled sweat that evens out the moisture deep inside the flower. This is where the magic happens and your terpenes wake up.
Step 1: Prep Your Jars
Snip your buds off the main branches. Grab wide-mouth glass Mason jars. Load your buds into the jars until they are about 75 percent full. Never pack them tight.
You need empty headspace at the top so air can move around.
Step 2: Add a Mini Hygrometer
Drop a small digital hygrometer inside each jar facing outward so you can read it through the glass. Seal the lid tight.
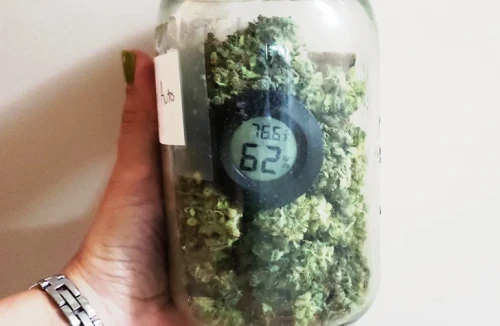
Step 3: Check Your Numbers After 24 Hours
Store the jars in a cool, dark cabinet between 60 and 70 degrees Fahrenheit. Check your meters the next day:
- 58% to 62% RH: Perfect. You hit the gold standard.
- Above 65% RH: The buds are still holding too much water inside. Dump them out onto clean cardboard for a few hours to air out, then jar them back up.
- Below 55% RH: The buds got slightly over-dried. Drop a 58% or 62% humidity control pack into the jar to slowly bring them back into balance.
The Art of Burping Your Jars
Burping is very simple. You open the jars to let trapped humidity out and let fresh oxygen in.
- Days 1 to 7: Pop the lids off your jars once or twice every single day. Let them sit open for 5 to 10 minutes. Give the jar a gentle shake so the buds do not clump together.
- Days 8 to 14: Open your jars every other day for a few minutes as the humidity readings stay steady.
- Days 15 and Beyond: Burp once a week.
How long should you cure?
Two to three weeks is the bare minimum for smooth smoke. Four to eight weeks is the sweet spot where most strains reach their absolute peak aroma and punch.
If you have the patience to wait two months, you will be rewarded with true connoisseur-level flavour.
Common Mistakes to Avoid
Forgetting to Burp
This is the number one cause of mouldy jars. If you open a jar and smell ammonia or old gym socks, you have trapped moisture. Vent those jars immediately to save the harvest.
The Orange Peel Myth
Never drop fruit peels, damp bread, or lettuce into your jars to rehydrate dry weed. That is an old myth and a fast ticket to mould. Always use clean, two-way humidity packs designed for cannabis.
Using Cheap Plastic Bags
Plastic baggies are not airtight. They let oxygen leak through and cause your buds to dry out and lose potency. Stick strictly to thick, airtight glass jars.
Frequently Asked Questions
What should my buds smell like during the cure?
During the first few days, your weed might smell a little bit grassy or green. Do not panic. By week two, the grassy smell will fade and the cultivar's true terpenes will explode with citrus, gas, pine, or berries.
Can I speed up drying with an oven or food dehydrator?
Never do this. High heat will instantly vaporize your terpenes and destroy THC. You will end up with brittle, tasteless brown weed. You cannot rush quality.
What is the difference between drying and curing?
Drying removes the extra water so your harvest does not rot on the branch. Curing is the slow equalization of moisture in an airtight jar that builds rich flavour and smooth smoke.
Drying makes your weed safe to store; curing makes it exceptional to smoke.
The Wrap Up
Post-harvest care is what separates average home-grow weed from absolute top-shelf fire.
Keep your dry space cool and dark. Wait for that clean stem snap before grabbing your jars. Fill your glass Mason jars, watch your humidity meters, and burp them regularly.
Give your flowers the time they deserve, and every hit will taste like pure craft quality.
If you want to review the full setup before your next run, head over to our ultimate guide on how to grow weed indoors to dial in every single step from seed to smoke.
At Weedseedsexpress, we are growers first. We know that great harvests start with world-class genetics.
When you are ready for your next run, explore our tested lineup of premium seeds and grow along with us. Keep your jars burped, and happy growing!