You don't need a PhD or a warehouse to pull big, sticky yields. You need a plan, a few key numbers, and the discipline to watch plants, not panic.
In this guide, we'll show you exactly how to maximize cannabis yield from seed to cure, with clear targets and no bro-science.
We've grown thousands of plants (and made our share of mistakes), so you can skip the heartbreak and get to the good stuff: dense colas, loud terps, and jars that stay heavy.
We'll cover everything, genetics, environment, lighting, roots, feeding, training, pest prevention, harvest timing, and a full troubleshooting clinic. We explain every acronym the moment it appears.
If you're starting from zero or recovering from a shaky first run, this is your blueprint.
And if you're hunting the right seeds, we test and ship fresh genetics at WeedSeedsExpress, with a germination guarantee and high-yield filters to keep things easy.
Key Takeaways
- Start with yield-forward genetics and a written grow plan (pot count, light coverage, and training) to maximize cannabis yield from day one.
- Lock in environment targets—24 °C-27 °C, stage-appropriate RH, and VPD ~1.0–1.5 kPa—with steady airflow and exchange for stress-free growth.
- Hit proven light benchmarks (PPFD 400–600 in veg, 800–1,000 in flower; DLI ~35–55) and adjust height/dimmer to avoid stretch or light burn.
- Build big roots and feed clean: use fabric pots, ensure drainage, keep root zone 20 °C-22 °C, and maintain pH (soil 6.2–6.8, coco 5.7–6.1) and EC suited to each stage.
- Train for a flat canopy—top photos at node 4–6, apply LST/ScrOG, and defoliate smartly—to turn uniform light into heavier colas and higher yield.
- Time the finish for potency and bag appeal: harvest at mostly cloudy trichomes with 10–20% amber, then dry 15 °C/60% RH and cure to truly maximize cannabis yield.
Start With The Right Genetics And A Solid Grow Plan
Genetics are the engine: nutrients are the fuel. You can pour race fuel into a minivan, still not a Ferrari. Start with high-yield cannabis seeds that match your space and skill level.
- Photoperiod vs. Autoflower: Photoperiod strains flower when you switch light to 12 hours on/12 off. They're forgiving and perfect for training. Autoflowers flip on their own after ~3–5 weeks: faster harvests, but less time to recover from mistakes.
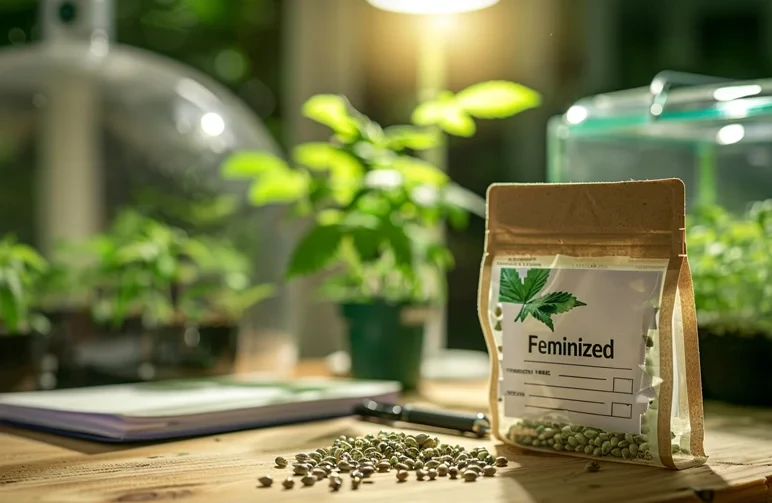
- feminised seeds: Nearly all beginners should run feminised photoperiods. No males, more control.
- Yield-forward picks: Look for medium/tall, vigorous hybrids with solid internodal spacing and thick lateral branching. Our catalogue at WeedSeedsExpress includes "High Yield" filters plus clear difficulty ratings.
Build the plan before you pop seeds:
- Space and pot count: Measure your tent height and footprint. Example: 2x4 ft tent = 2–4 plants in 3–5 gallon pots.
- Light coverage: One quality LED that actually draws 300–480 watts from the wall can cover a 2x4. Check manufacturer PPFD maps, not just marketing.
- Timeline: Plan 4–6 weeks veg (photoperiods), 8–10 weeks flower. Autos: 9–12 weeks seed to chop depending on strain.
- Training: Decide if you'll top and ScrOG (screen of green) or run a simple low-stress train. Write it down.
Pro move: Choose 2–3 of the same strain for uniformity your first time. It's way easier to dial one phenotype than juggle four divas. And yes, buy legit. Shady seedbanks equal mystery plants. WeedSeedsExpress has fresh stock, lots of lab-backed reports, and we stand behind germination.
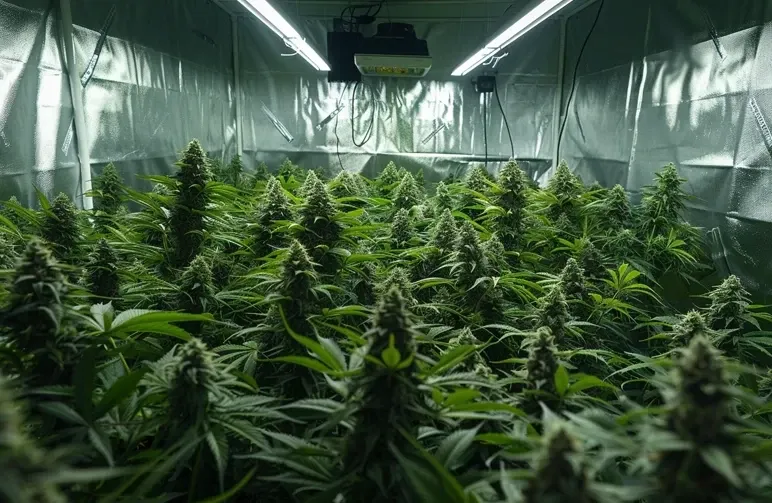
Master Your Environment: Temperature, Humidity, VPD, And Airflow
Environment is free yield. Nail it, and plants cruise.
- Temperature: Aim for 75–80°F (24 °C-27 °C) lights on: 68–72°F (20 °C-22 °C) lights off. Autos and warmer indica-leaning hybrids like the higher end. Don't swing more than ~10°F ([5.5:celsius]) between day and night.
- Humidity: Seedlings 65–70% RH (relative humidity), veg 55–65%, early flower 50–55%, late flower 40–45% to prevent mould.
- VPD (Vapor Pressure Deficit): Think of VPD as the plant's comfort zone for water movement. The sweet spot for fast growth is ~1.0–1.3 kPa in veg and ~1.2–1.5 kPa in flower. Use a VPD chart or app: set temp first, then adjust humidity to hit target.
- Airflow: Two things matter, movement and exchange. Movement is fans gently shaking leaves to keep a boundary layer of air fresh. Exchange is exhausting stale air and bringing in fresh.
Hardware checklist:
- Inline exhaust fan sized to your tent (a 4" fan for 2x2/2x4: 6" for 3x3/4x4) with a carbon filter.
- Two clip fans in a 2x4 or 3x3, one below canopy, one above. Leaves should flutter, not fold.
- Hygrometer/thermometer (with min/max memory). If you can swing it, a simple controller is worth its weight in gold for stable temps/RH.
If you're asking, "Is my plant ruined?" because you hit 29 °C one afternoon, probably not. But repeated heat stress slows growth and invites foxtailing. Stabilize the room, then the tent.
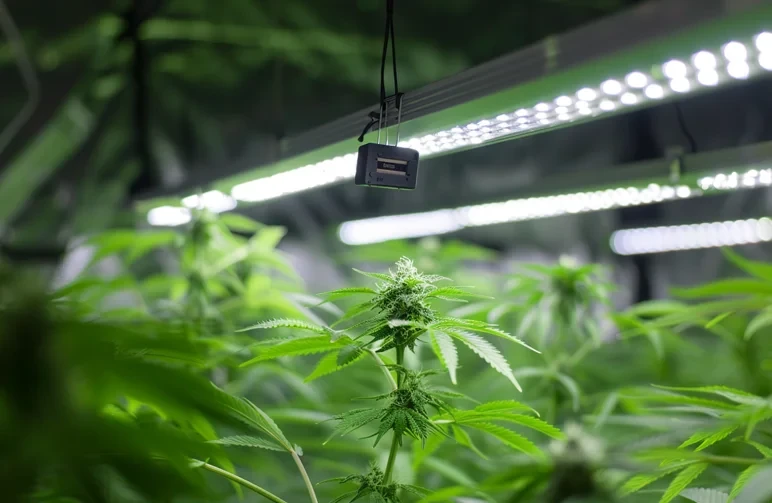
Dial In Your Lighting: PPFD, DLI, Spectrum, And Height
Light is your horsepower. Two terms matter most:
- PPFD (Photosynthetic Photon Flux Density): Light intensity measured at the canopy as micromoles per square meter per second (µmol/m²/s).
- DLI (Daily Light Integral): Total photons a plant gets in a day, measured in mol/m²/day. It's PPFD + hours.
Targets by stage:
- Seedling: 200–300 PPFD, DLI ~12–15.
- Veg: 400–600 PPFD, DLI ~25–35.
- Flower weeks 1–3: 600–800 PPFD, DLI ~35–45.
- Flower weeks 4–7+: 800–1,000 PPFD, DLI ~40–55 (CO₂ not required up to ~1,000).
Spectrum: Full-spectrum white LEDs with added 660 nm deep red and a touch of 730 nm far-red drive yield by improving photosynthesis and morphology. Don't overthink it, buy a reputable LED with published PPFD maps.
Height and dimming: Start high and dimmed: lower the light or raise intensity gradually to hit PPFD targets without frying tops. Watch for canoeing leaves or bleached tips, classic light stress.
Pro tip: Use a phone-based PAR meter app with a $20 diffuser, or borrow a meter. If you can't, follow the maker's hanging chart and plant feedback. Uniform coverage > raw wattage.
Build Big Roots: Containers, Medium, Drainage, And Transplants
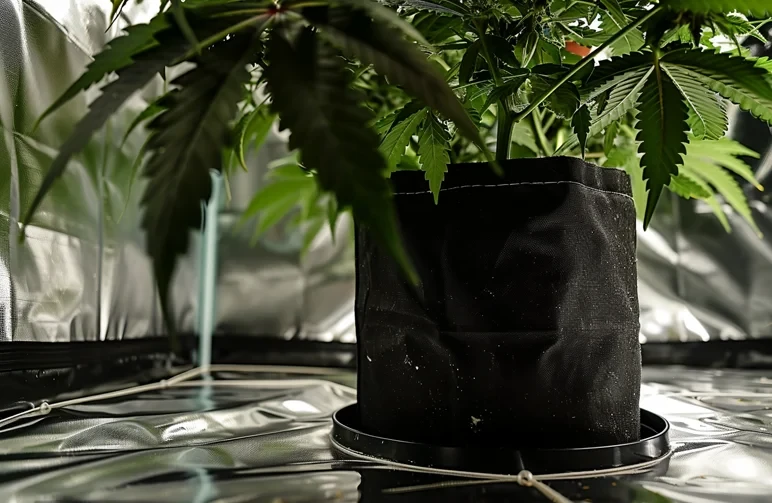
Big roots equal big fruits. We push oxygen to the root zone and avoid waterlogging.
- Containers: Fabric pots breathe and air-prune roots (prevents circling), so they're our go-to for soil or coco. Size guide per plant: 3 gallons in a 2x2, 3–5 gallons in a 2x4, 5–7 gallons in a 4x4. Autos prefer their final pot day 1 to avoid transplant shock.
- Medium: Beginners crush it with quality soil or coco coir. Soil is buffered and forgiving. Coco is hydro-like, fast growth if you water more often and manage pH/EC.
- Drainage: Elevate pots on risers. Always have a tray to catch runoff. Standing water = root rot.
- Transplants: Photoperiods can start in solo cups, then up-pot when roots circle the cup (7–14 days), then again to final. Water lightly after transplant and avoid blasting high light the first 24 hours.
Root zone temperature: Keep the medium ~68–72°F (20–22°C). Cold roots slow nutrient uptake: hot roots reduce oxygen. If your floor is chilly, use foam mats.
Feed And Water For Growth: Nutrients, pH/EC, And Irrigation Rhythm
We feed the plant what it can use, when it can use it. More bottles ≠ more yield.
- Nutrients: Cannabis needs nitrogen (N) for veg, phosphorus (P) and potassium (K) for flower, plus calcium, magnesium, and trace elements. A simple 3-part line or a two-bottle "grow/bloom" plus Cal-Mag is enough.
- pH: pH is acidity/alkalinity. Get it right or nutrients lock out. Targets by medium: soil 6.2–6.8 (aim 6.5), coco/hydro 5.7–6.1 (aim 5.8–6.0).
- EC (Electrical Conductivity): A measure of nutrient strength. Think of it as how "salty" your solution is. Targets: seedlings 0.4–0.8 mS/cm, veg 1.0–1.6, early flower 1.6–2.0, late flower 1.4–1.8. Always read your strain, some eat light.
Irrigation rhythm:
- Soil: Water when the pot feels light and top inch is dry. Fully saturate until ~10–20% runoff, then let it dry back. Overwatering happens from frequency, not volume.
- Coco: Feed to runoff daily or every other day once roots are established. Coco likes frequent, lighter feedings.
Reading leaves: Dark, clawed leaves = too much N. Pale, uniform yellowing in flower = normal fade. Interveinal chlorosis (green veins, yellow between) often = magnesium deficiency: add Cal-Mag and check pH.
If tips burn, back EC down by 10–20%. Gentle wins races.
Train The Canopy: Topping, LST, ScrOG, And Smart Defoliation
With autos, every decision needs to respect the clock. With photos, we sculpt.
- Topping: Cutting the main tip to split growth. Top photoperiods around node 4–6 (when you can count 4–6 sets of true leaves). This creates more tops and a flatter canopy.
Avoid topping autos unless they're very vigorous and you're experienced. - LST (Low-Stress Training): Bending branches sideways and tying them down. Do this after topping to spread the plant, increase light penetration, and keep all tops the same height.
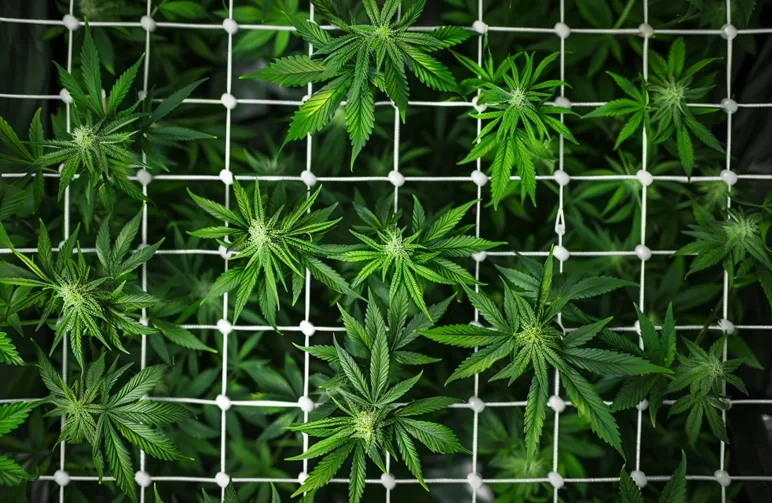
- ScrOG (Screen of Green): A trellis net 8–12 inches above pots. We fill 70–80% of the screen in veg, then flip to flower. Tuck branches under the net daily in week 1–2 of flower to maintain a flat, efficient canopy.
- Defoliation: Remove leaves that block bud sites or create humidity pockets. Go light. Autos: minimal defol, only damaged leaves or a couple per session after week 3.
Photoperiods: a cleanup right before flip and a tidy in week 2 of flower, then stop.
Remember: a flat, uniform canopy turns your light into yield. Peaks and valleys waste photons.
Prevent Problems Early: IPM, Cleanliness, And Plant Health Monitoring
IPM = Integrated Pest Management. Translation: keep pests out, spot issues early, fix fast.
Baseline IPM:
- Quarantine new clones or plants for 10–14 days away from your tent.
- Sticky traps at canopy and soil level to monitor fungus gnats and flying pests.
- Clean the tent: wipe surfaces with a mild peroxide solution between runs, vacuum often, no wet leaves on the floor.
- Neem alternatives: Cold-pressed neem is effective but odorous: we like insecticidal soap, horticultural oils (e.g., thyme/rosemary-based), and beneficial predators (ladybugs, predatory mites) when needed.
Monitoring routine (15 minutes, 3x/week):
- Flip leaves and inspect with a small loupe.
- Check new growth colour and leaf posture.
- Log temp/RH highs/lows. If RH spikes at night late flower, increase exhaust or add a dehumidifier.
Healthy plants resist problems. Stressed plants invite them.
Time The Finish: Ripeness, Harvest Technique, Dry, And Cure

Peak yield and potency live at the finish line.
Ripeness cues:
- Pistils (hairs): Mostly brown/orange and receded is a hint, not the rule.
- Trichomes: Use a 60x loupe. Clear = early, cloudy = peak THC, amber = more sedating. Most growers chop at mostly cloudy with 10–20% amber on upper buds.
Harvest technique:
- Dark period: Optional 12–24 hours dark before chop, won't fix a bad grow, but can tighten things up.
- Chop whole plant or large branches, handle gently. Always use clean, sharp scissors.
Drying targets:
- 60°F/60% RH ([15.5:celsius]/60% RH) for 7–14 days. Fans moving air in the room, not directly on buds.
- Stems should "snap," not bend, before you jar.
Curing targets:
- Jar at ~62% RH. Use hygrometers in a few jars.
- Burp (open) jars daily for 10–15 minutes the first week, every few days in week 2–3. Ideal cure: 3–6 weeks. You'll see aromas bloom and smoke smooth out.
This stage alone can swing perceived yield, airy buds tighten as moisture distributes evenly and chlorophyll harshness fades.
Troubleshooting Yield Killers And Quick Fixes
What Temperature, Humidity, And VPD Really Mean (And How To Set Them)
Temperature drives metabolism: humidity controls transpiration (water loss through leaves). VPD is the pressure difference between leaf moisture and air moisture, a shorthand for how hard the plant is "breathing."
How to set:
- Pick your plant stage (veg/flower) and choose a temp in range: [25.5:celsius] veg, 25 °C flower is a great baseline.
- Use a VPD chart/app. At [25.5:celsius], aim 60% RH in veg (~1.1–1.2 kPa) and 50% RH in flower (~1.3–1.4 kPa).
- Adjust fans, humidifier/dehumidifier to hit numbers. Stable beats perfect.
If leaves taco upward and feel dry, VPD is too high (too dry or too hot). If leaves droop and feel swollen, VPD too low (too humid/cool).
Airflow, Exchange, And Negative Pressure For Strong Plants
- Airflow = oscillating fans inside the tent. Goal: gentle leaf flutter everywhere.
- Exchange = the exhaust system pulling stale air out, fresh air in. Target: a full tent air exchange every 1–2 minutes.
- Negative pressure = tent walls suck in slightly when exhaust runs. This prevents smells from leaking and ensures incoming air is filtered.
Quick fix: If RH spikes at night, run exhaust at low speed 24/7 and add a small dehumidifier in the room, not inside the tent.
When CO₂ Makes Sense (And The Minimum Setup You Need)
CO₂ (carbon dioxide) lets plants use higher light intensities. It only helps when three things are already dialed: light (900–1,000 PPFD), nutrients, and environment. If you can't hold [25.5:celsius] and stable RH, skip CO₂.
Minimum viable setup:
- Sealed or semi-sealed room, CO₂ tank/regulator or controller, maintain 1,000–1,200 ppm during lights on.
- More airflow in the tent is not CO₂ enrichment. Don't waste money on bags, real gains need measured ppm.
PPFD And DLI Targets For Seedling, Veg, And Flower
- Seedlings: 200–300 PPFD: 18-hour day gives ~13–19 DLI.
- Veg: 400–600 PPFD: 18 hours = ~26–39 DLI.
- Flower: 800–1,000 PPFD: 12 hours = ~35–43 DLI. That's the money zone without CO₂.
If you don't have a meter, start high and dimmed. Raise intensity weekly while watching leaf posture.
Hanging Height And Dimming To Avoid Light Burn Or Stretch
- Stretching? Lower the light a few inches or increase dimmer 10%. Keep temps in range so plants can use the light.
- Bleaching or canoeing leaves? Raise the light 4–6 inches or dim 10–20% and ensure tops aren't too close to fans.
Aim for 12–18 inches above canopy for most bar LEDs at full power in flower, check your fixture map.
Light Schedules For Autos vs. Photoperiods
- Photoperiod veg: 18/6 or 20/4. Flower: 12/12.
- Autos: 18/6 or 20/4 from start to finish. We like 20/4 for autos if heat allows, more light hours = more DLI.
Don't flip photoperiods until the screen is ~70–80% full (ScrOG) or plants are half the final height you want, they'll stretch 1–2x.
Pot Size, Fabric vs. Plastic, And Root Zone Temperature
- Pot size affects watering cadence and root mass. Too small = constant watering, stunted yield: too big = easy to overwater early.
- Fabric pots promote oxygen and fine root hairs, usually better yields indoors.
- Root zone: keep medium ~20 °C-22 °C. If your tent floor is cold, raise pots and insulate.
Soil, Coco, Or Hydro: Pros, Cons, And Yield Implications
- Soil: Forgiving, rich flavour, slower but steady. Great for beginners. Biggest risk: overwatering.
- Coco: Faster growth, big yields, requires frequent feeds and pH precision. Sweet spot for many home growers.
- Hydro (DWC, etc.): Fastest growth and huge yields when dialed: unforgiving of mistakes.
If yield is priority with manageable complexity, coco in fabric pots is our pick. For first grow with max forgiveness, quality soil wins.
pH And EC Explained: Simple Targets That Prevent Lockout
- pH controls which nutrients are available. Soil 6.2–6.8 (aim 6.5). Coco/hydro 5.7–6.1 (aim 5.8–6.0).
- EC is nutrient strength. Start low, increase as plants ask. Burnt tips = too hot: pale and hungry = increase slightly.
Always calibrate your pH pen monthly. It's a $15 bottle of solution that saves your harvest.
Feeding Calendars, Additives, And When To Back Off
- Use the manufacturer's schedule at 50–75% strength to start. Most printed charts are aggressive.
- Additives that actually move yield: silica in veg for stronger branches, beneficial microbes for root health, PK booster in mid-flower, but only if the base feed is stable.
- Back off when runoff EC rises week over week or leaf tips burn. Flush lightly (low EC water) and resume lower strength.
Watering Technique: Full Saturation, Runoff, And Dry-Back
- Soil: Water until 10–20% runoff, then wait for the pot to get light. Lift the pot, your hands are a great moisture meter.
- Coco: Feed to runoff daily or every other day. Consistency > hero watering.
Droop after watering? Usually overwatering frequency. Let them dry longer and increase airflow across pots.
When To Top (Node Count), How To LST, And ScrOG Step-By-Step
Top photoperiods at node 4–6. Sterilize scissors. After 3–5 days, start LST: gently bend main branches outward and tie to the pot rim.
ScrOG steps: set net 8–12 inches above pots, veg until 70–80% filled, flip to 12/12, then tuck shoots under the net daily for 10–14 days as they stretch. Stop tucking when the stretch ends and let buds rise.
Autos: usually skip topping. Use LST only, bend the main stem gently after the 4th node and spread side branches.
Defoliation Do's And Don'ts (Autos vs. Photos)
- Do: Remove large fans blocking multiple bud sites, thin dense interior leaves creating moisture pockets, and clean up larfy lower growth that'll never see strong light.
- Don't: Strip plants bare. In photos, do a light defol before flip and again at day 14 of flower. In autos, take a leaf or two at a time, spaced out, never heavy sessions.
If you're unsure, take less. You can always remove more later.
Baseline IPM: Sticky Traps, Neem Alternatives, And Quarantine
- Sticky traps tell you what's flying. If gnats appear, let topsoil dry more between waterings, add yellow traps, and consider a Bacillus thuringiensis israelensis (BTi) product.
- For mites/thrips: Insecticidal soap followed by a horticultural oil (not in strong light) works early. Beneficial predators help in stubborn cases.
- Quarantine newcomers. Wash hands and change clothes after outdoor gardening. Sounds fussy: saves harvests.
Reading Trichomes And Pistils For Peak Yield And Potency
- Pistils are the teaser trailer: trichomes are the movie. Aim for mostly cloudy trichomes with 10–20% amber for a strong, balanced effect and full bag appeal.
- Lower buds mature slower. Sample from top and mid-canopy to decide.
Dry And Cure Targets: Temperature, RH, And Jar Burping
- Dry: [15.5:celsius]/60% RH, 7–14 days, lights off. If it's drying too fast, raise RH a bit or hang whole plants.
- Cure: Jar at ~62% RH. Burp daily for week 1, then every few days. If RH stays >70% in jars, pull buds out for an hour to avoid mould.
Stretch, Heat Stress, Overfeeding, And Other Silent Yield Thieves
- Stretch: Too little light or high distance. Fix by increasing PPFD gradually and managing temps.
- Heat stress: Leaves taco, buds fox-tail. Lower temps or increase AC/exhaust, raise lights.
- Overfeeding: Tip burn, dark clawing. Drop EC 10–20%, flush lightly, resume lower.
- Underwatering/overwatering: Both cause droop. Check pot weight and adjust cadence.
- pH drift: Sudden deficiencies even though feeding? Calibrate pen and correct pH.
Fast rescue hierarchy: stabilize environment, check pH, lower EC if burnt, raise light if bleached, prune only if airflow is compromised.
If you want genetics that forgive a wobble and still stack, browse the High Yield and Easy-To-Grow categories at WeedSeedsExpress. We built those filters for exactly this.
Frequently Asked Questions
What’s the simplest plan to maximize cannabis yield indoors from seed to cure?
Pick proven, high-yield genetics that fit your space, then lock in environment and light. Aim 24 °C-27 °C days, stage-appropriate RH/VPD, and PPFD/DLI targets.
Build big roots in fabric pots, keep pH/EC in range, train a flat canopy (LST/ScrOG), and finish with a slow dry ([15.5:celsius]/60% RH) and 3–6 week cure.
Photoperiod vs. autoflower: which produces higher yield and why?
Photoperiods usually yield more because you control veg length and training (topping, ScrOG) before flipping to 12/12. Autoflowers finish faster but have limited recovery time, so heavy training can reduce output.
New growers seeking maximum yield often choose feminised photoperiods for flexibility and canopy management.
What PPFD, DLI, and VPD targets should I use to maximize cannabis yield?
Seedlings: 200–300 PPFD, DLI 12–15. Veg: 400–600 PPFD, DLI 25–35, VPD ~1.0–1.3 kPa. Early flower: 600–800 PPFD, DLI 35–45. Mid/late flower: 800–1,000 PPFD, DLI 40–55, VPD ~1.2–1.5 kPa.
Use full-spectrum LEDs, raise intensity gradually, and watch for light stress.
How should I feed and water to prevent lockout and boost yield?
Match pH to medium: soil 6.2–6.8 (aim 6.5), coco/hydro 5.7–6.1 (aim 5.8–6.0). Track EC: seedlings 0.4–0.8, veg 1.0–1.6, early flower 1.6–2.0, late 1.4–1.8 mS/cm. In soil, water to 10–20% runoff then dry back; in coco, feed to runoff daily. Adjust if tips burn or leaves claw.
How much yield can I expect in a 2x4 tent with a quality LED?
Results vary by genetics, training, and environment, but a common indoor benchmark is roughly 0.5–1.5 grams per watt with dialed conditions. With a true 300–480W LED over a 2x4, many growers see 6–16 ounces total.
A flat ScrOG canopy and proper dry/cure help hit the high end.
Do organic or synthetic nutrients maximize cannabis yield better?
Both can deliver top yields if pH/EC, irrigation rhythm, and environment are dialed. Synthetics offer precise control and fast response—great in coco. Organics in quality soil are forgiving and build flavour/terp complexity.
For pure yield chasing, many growers prefer coco with a simple mineral base plus Cal-Mag and microbes.


