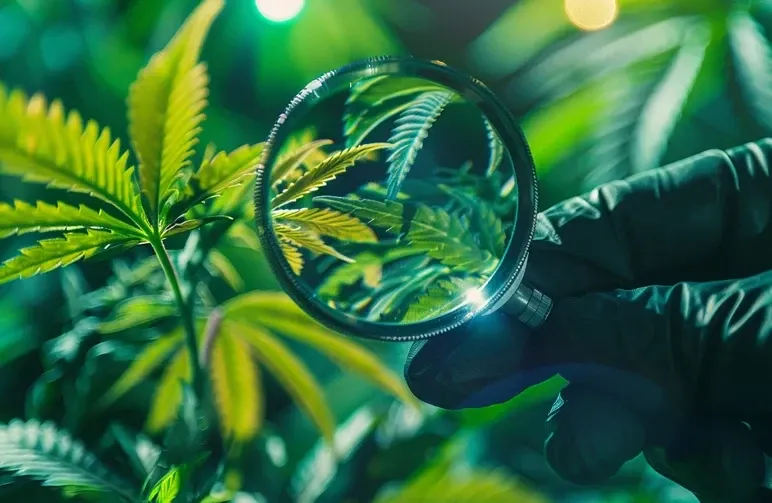
That sinking feeling when you spot a yellow leaf, a weird curl, or a suspicious spot is universal. Is it nothing, or is it the start of a crop-killing disaster?
Take a breath. You can fix this.
This is not another vague guide. This is a battle-tested diagnostic playbook we use every day to save plants—both our own and those in our community.
We'll teach you the professional decision tree: Observe → Measure → Correct → Monitor. You'll learn to see past look-alike symptoms and solve the root cause, not just the symptom.
Key Takeaways: The 5-Minute Emergency Checklist
- Check pH & EC First: Before touching anything else, test your feed and runoff. Soil (6.2–6.8 pH) and Coco/Hydro (5.5–6.1 pH) have different needs. High runoff EC means you have salt buildup (lockout).
- Flush To Reset, Then Feed Light: If lockout is the issue, flush with pH-balanced water. Resume feeding at 50-70% strength. Don't add more nutrients to a locked-out plant.
- Scout Daily For Pests: Check under leaves every 1-2 days. Use sticky cards. Catching pests early is 90% of the battle.
- Master Your Environment: Keep temps between 75–82°F (24 °C-28 °C) and humidity right for the stage (Veg: 60%, Flower: 40-50%). Bad environments invite pests and mould.
- Choose Resilient Genetics: The easiest problems to solve are the ones you never get. Starting with stable, vigorous seeds makes everything easier. At WeedSeedsExpress, we hand-pick and guarantee genetics that can handle real-world conditions.
Is Your Cannabis Plant Sick? How to Use This Guide
Before you reach for the bottle or the scissors, collect data. Cannabis is expressive: yellowing, curling, spots, or droop all tell a story, but only in context.
Essential Tools for Diagnosis- A quality pH Pen
- An EC/PPM Meter
- A magnifying loupe or jeweler's microscope
- Yellow sticky cards for pest monitoring

Here's our quick triage you can run in 10–15 minutes:
Stage and medium: Note veg vs. flower, and what you're growing in (soil, coco, hydro, living soil). Deficiency risk and pH windows change by medium.
pH and EC/PPM: Test your nutrient solution and your runoff. Ideal root-zone pH is about 6.2–6.8 in soil and 5.5–6.1 in coco/hydro. Runoff landing roughly 5.8–6.5 means you're in the zone. EC too high? You're salting up and courting lockout.
Watering history: When did you last water and how much? Overwatering mimics half the problems in this guide.
Environment: Log 24-hour highs/lows. Target 70–85°F (21 °C-29 °C) lights on, 40–60% RH (lower in late flower). Wild swings stress plants and open the door to pests and pathogens.
Light intensity: Too close or too dim? Upper-leaf tacoing and bleaching scream light/heat stress: limp, stretched plants beg for more photons.
Symptom pattern: Upper leaves often reflect immobile-nutrient issues (or light excess). Lower leaves and older growth point to mobile-nutrient deficiencies or root problems.
Spots vs. interveinal yellowing, crispy margins vs. soft droop, these details matter.
Shoot a few clear photos (top, side, underside of leaves), then move into Part 1. We always correct pH and root-zone basics first: pure "add X nutrient" guesses can compound the mess. Watch the plant, not the calendar.
Part 1: Nutrient Problems (The Most Common Issue)
With nutrients, too much and too little can look eerily similar. And pH is the gatekeeper. Nine times out of ten, what looks like a deficiency is actually nutrient lockout.
Understanding the Basics: Nutrient Lockout
Lockout happens when pH drifts out of range or salts build up, blocking uptake. Plants then "deficiency cosplay," yellowing and stalling even as you feed more, making it worse.
In Soil: Above ~7.0 pH, iron, manganese, and phosphorus uptake tank.
In Coco/Hydro: Above ~6.2 pH, calcium and magnesium go stubborn.
How we reset lockout:
- Confirm: Test the EC/PPM and pH of both your feed and your runoff. If runoff EC is way higher than your feed, salts are stacking.
- Flush: Use pH-balanced water (5.8–6.0 in coco/hydro: 6.2–6.5 in soil) until the runoff EC drops close to your input water's EC.
- Resume: Begin feeding again at 50–70% strength with a balanced base nutrient. Add cal-mag only if your water is soft/RO or LEDs are intense.
- Wait: Give it 3–5 days. New growth should improve. Damaged leaves rarely heal, so judge the fix by what emerges, not what's already crispy.
Pro tip: If you're unsure whether it's a true deficiency or lockout, a light foliar feed (0.2–0.4 EC, pH ~6.0) on a test branch can be a diagnostic. Fast green-up from foliar, but not at the roots, confirms lockout.
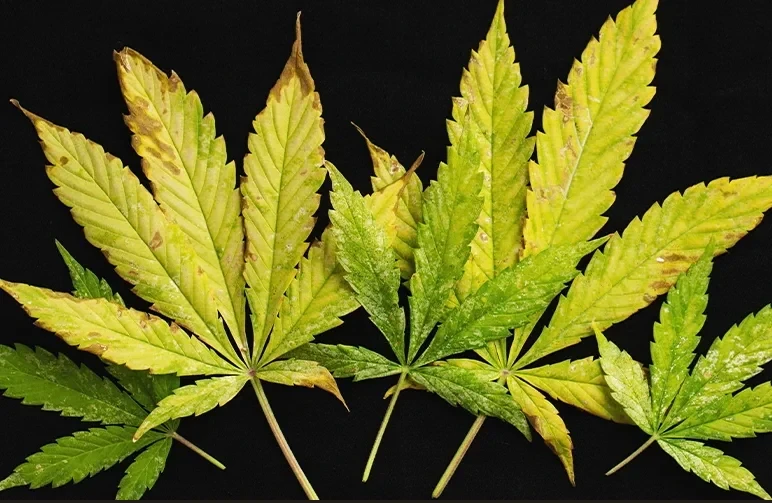
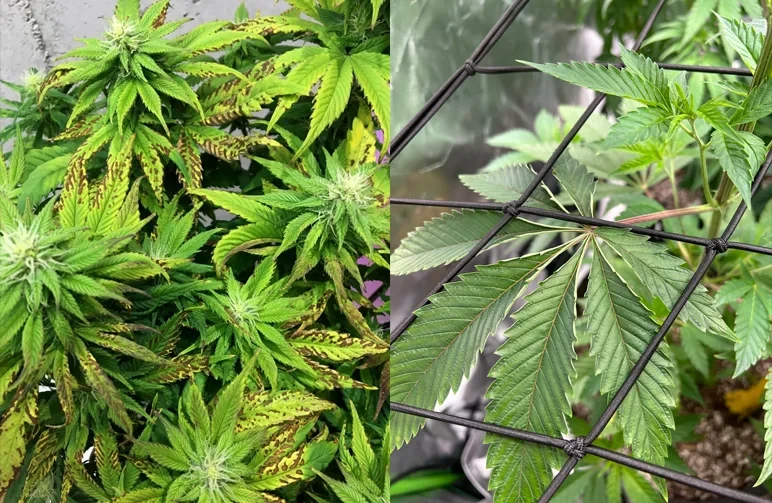
Macronutrient Deficiencies
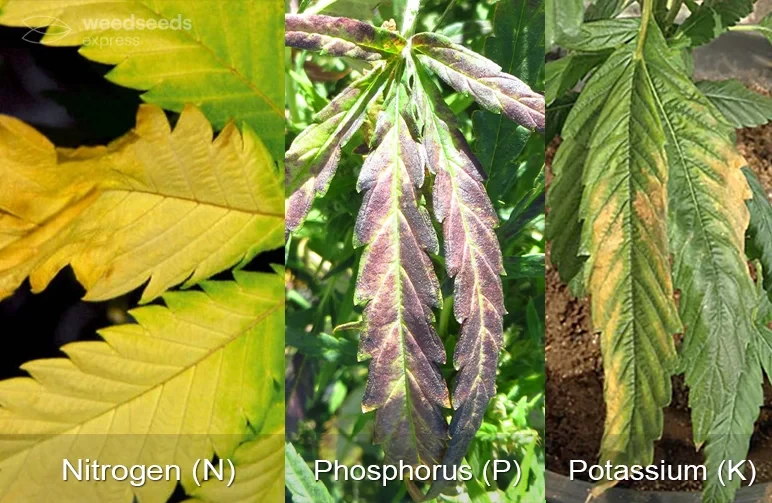
Nitrogen (N): The key symptom is uniform yellowing of lower, older leaves that progresses up the plant. Growth slows. In veg, feed a bit more N or bump base nutrient slightly after a pH check. Don't chase N in late flower: mild fade is normal.
Phosphorus (P): Look for stunted growth, dark/blue-green foliage, and sometimes reddish/purple stems. In cool temps, you may see necrotic patches on older leaves. Warm the root zone to 72–75°F and correct pH before adding a P-heavy booster.
Potassium (K): The classic sign is yellowing and crispy, burnt-looking leaf edges and tips. You'll also see weak stems and poor flower density if it's chronic. After verifying pH, increase K via your base nutrient: avoid spiking PK boosters early.
Secondary and Micronutrient Deficiencies
Calcium (Ca): Watch for crinkled, brittle new growth with brown pinprick spots and curled tips. This is common under strong LEDs and in soft/RO water. Add cal-mag at 0.3–0.5 EC and ensure pH is in range.
Magnesium (Mg): The tell-tale sign is yellowing between the veins on older leaves, creating a striped or "road map" look. Add a cal-mag supplement or Epsom salt at 0.2 EC after pH correction.
Sulfur (S): New growth turns pale lime green, similar to N but it hits the top growth first. This is rare if you're using reputable base nutrients.
Iron (Fe): Look for bright yellow new growth with very distinct green veins. This is almost always caused by high pH. Lower the pH to the correct range and it often self-corrects.
Nutrient Burn: The Problem of Too Much
The classic sign: dark green leaves with burnt, crispy tips that progress inward. Runoff EC high? You're cooking them.
Fix it fast:
- Back feed strength down 25–50% and flush if EC is stacked.
- Reset your schedule. Many lines overstate feed charts; start at 50–60% and let the plant vote.
- Watch for salt crust on soil/hydroton. Rinse and rehydrate media thoroughly.
If you want genetics that don't throw tantrums, lean into stable lines. We test for vigor and disease resistance. Explore resilient feminised and autoflower options at our Amsterdam HQ: Buy premium cannabis seeds at WeedSeedsExpress.
Part 2: Watering and Root Zone Issues
Unhappy roots punish everything else. With watering, most growers get in trouble by caring too much.
The #1 Beginner Mistake: Overwatering
Symptoms:Droopy, heavy leaves that feel turgid and full. The container stays heavy long after watering, and new growth may be pale. In hydro, roots look tan, coated, and can smell swampy.
Why it happens: Saturated media suffocates roots, which need oxygen. It's the #1 mimic of "mysterious deficiencies."
Fix and prevent:
- Water only when the top 1–2 inches of soil are dry, or when pots feel light.
- Improve drainage: use fabric pots or add perlite to your soil mix.
- Keep gentle air movement across your containers.
- Add beneficial microbes/mycorrhizae and keep root temps at 68–72°F (20 °C-22 °C).
Because the symptoms are so similar, many growers struggle to tell if their plant is drowning or thirsty.
If you are unsure which one you're facing, check our guide on overwatering vs. underwatering cannabis to make the right adjustment before the roots suffer further.

Underwatering Your Cannabis Plants
Symptoms:Leaves droop but feel papery and lifeless. The whole plant looks limp. The soil pulls away from the edges of the pot.
Fix: Water thoroughly to slight runoff and establish a consistent rhythm. Avoid the yo-yo of flood-and-drought: it destroys root tips and yields.
Root Health Problems
Root-bound: Plants stall, show odd deficiencies, and dry out rapidly. You'll see circling roots at the pot edges. Transplant one size up before flower. Autos dislike late transplants; start them in their final pot.
Root rot:Brown, slimy roots, a foul smell, and rapid wilting. Immediately improve aeration, lower media moisture, and add beneficials. In hydro, up the dissolved oxygen (bigger airstones, cooler reservoir at 65–68°F).
Part 3: Pests, Diseases, and moulds
The key is early detection and a layered response. We scout every other day—tops, undersides, stems, and soil surface.
Identifying and Eliminating Common Cannabis Pests
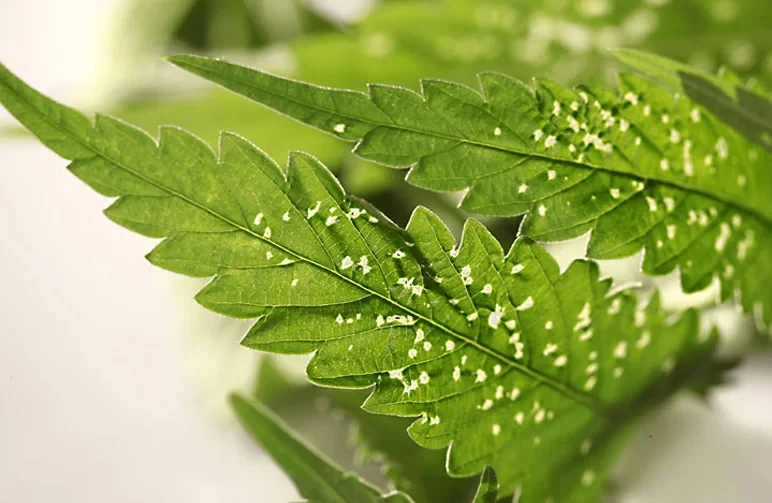
Spider Mites: Look for tiny white or yellow spots (stippling) on leaves and fine, silky webbing on the undersides. Use a loupe to confirm.
Because these pests can ruin a crop in days, you must know how to identify and get rid of spider mites before they wrap your flowers in silk. Knockdown with neem oil or insecticidal soap at lights-off, then release predatory mites.
Thrips: You'll see irregular, silvery/shiny patches on leaves with tiny black specks (their frass). Use spinosad (where legal) and blue sticky traps. Boost airflow and cleanliness.
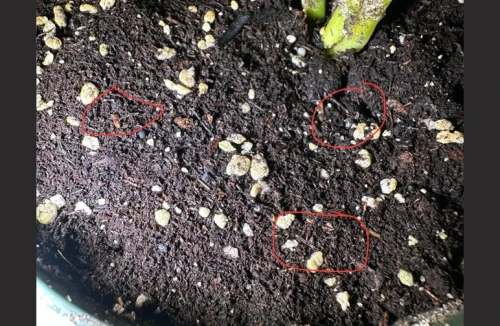
Fungus Gnats: These are small, flying insects that look like fruit flies hovering around your soil. Their larvae munch roots and spread disease. Let the top inch of media dry out and use sticky traps for adults.
For a permanent solution, learn how to get rid of fungus gnats in cannabis to protect your delicate root hairs from larvae damage.
Always inspect leaf undersides with a loupe. Missed eggs = round two.
Battling Common Diseases and moulds
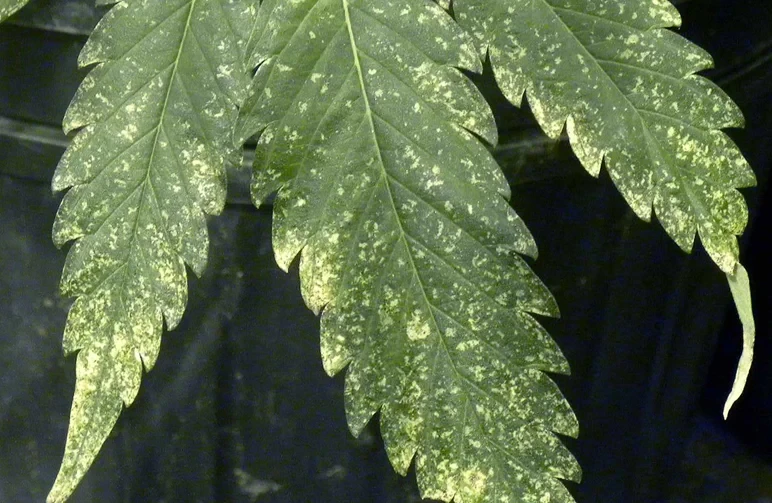
Powdery Mildew (PM): Distinctive white, talc-like patches on leaves that can be wiped off. Lower humidity to 45–55% RH, increase air exchange, and prune dense interior growth.
Treat with potassium bicarbonate or a biological fungicide. It is vital to spot and treat powdery mildew early, as it can quickly spread through your ventilation to every plant in the room.
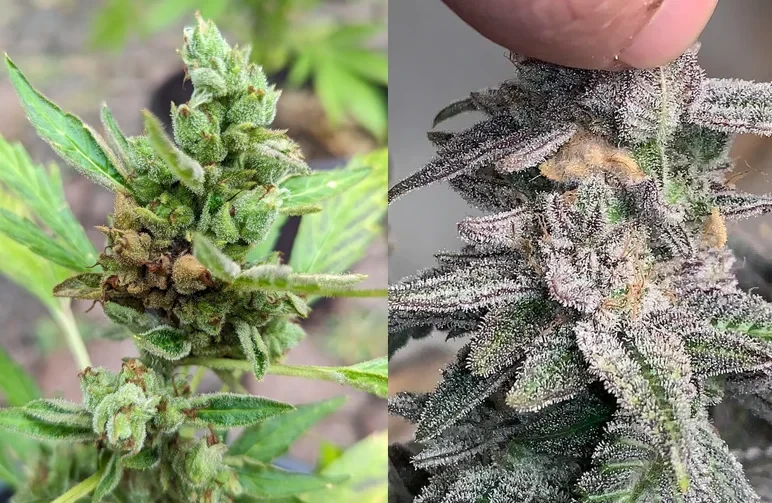
Bud Rot (Botrytis): The horror story. Buds turn brown, grey, and fuzzy from the inside out, often destroying your best colas before you even see the mould.
Identifying and curing bud rot immediately is the only way to stop the spores from spreading to the rest of your garden. If you find it, remove the affected flowers with sterilized shears and drop your RH below 50%."
Hygiene beats heroics. Clean tents, sterilize shears, and quarantine new clones.
Part 4: Environmental Stress and Lighting Issues
A dialed-in environment turns "okay" harvests into head-turners.
Temperature and Humidity Problems
Too hot:Leaf edges canoe upward ("taco leaves") and feel crispy. Aim for 75–82°F (24 °C-28 °C). Add ventilation and increase light distance to reduce leaf surface temps.
Too cold: Slow metabolism, poor P uptake, and soggy media that won't dry. You may see purple stems and a general lack of vigor. Keep root zones above 68°F (20 °C).
Humidity swings: High humidity invites mould; low humidity spikes nutrient demand. Keep RH at 55–65% in veg, 45–55% in early flower, and 40–50% in late flower.
Light-Related Problems
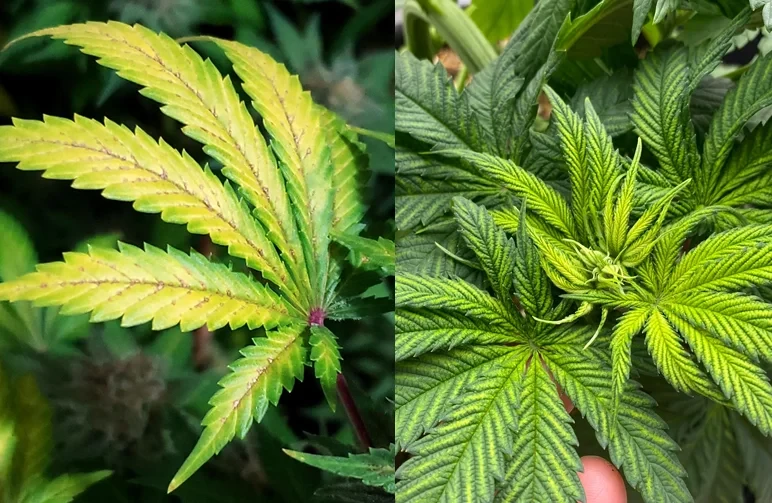
Too little light: Causes tall, weak stems with big gaps between nodes (stretch). Bud development will be slow and airy. Increase your light's intensity (PPFD) or lower the fixture gradually.
Too much light/heat: Look for bleaching and yellowing on the top leaves closest to the light. This can look like a nitrogen deficiency, but it only affects the very top of the canopy. Raise your lights or dim the output.
Understanding the specific difference between cannabis light burn and heat stress symptoms is key to keeping your upper canopy healthy and productive.
While avoiding stress is the priority, once your environment is dialed in, you can explore how increasing light levels affect yield and potency to push your genetics to their maximum potential.
Proactive Care: An Ounce of Prevention
Great growers are boringly consistent. That's the secret.
- Keep pH in range every feeding. Calibrate pens monthly.
- Feed light, watch response. Start at 50–60% of the bottle's chart and let runoff EC guide you.
- Water smart: Saturate fully, then let the pot get light before watering again.
- Airflow and sanitation are non-negotiable.
- Scout daily. Look under the leaves.
- Choose resilient genetics. Disease-resistant, vigorous cultivars forgive small mistakes. Our team curates them for you at WeedSeedsExpress.
Frequently Asked Questions (FAQ)
Yellow leaves, what do I check first?
Start with pH and runoff EC, then your watering rhythm. If both are on point, match the pattern: lower-leaf fade = N; interveinal yellowing = Mg; bright yellow new growth = Fe/high pH; top-leaf bleaching = light stress.
My plants are growing painfully slow. Why?
Roots, light, or temperature. Confirm you're not overwatering, ensure your light provides adequate PPFD for the growth stage, and keep temps in the 75–82°F range.
How do I tell overwatering from underwatering?
Overwatered leaves droop and feel heavy/full; the pot stays weighty. Underwatered leaves droop but feel dry/papery; the pot is light.
When should I flush?
Flush to correct salt buildup (runoff EC much higher than input) or severe lockout. Many growers now prefer a simple low-EC taper for the final week instead of an aggressive water-only flush.
Best quick upgrades to prevent problems?
Fabric pots for root aeration, a reliable pH/EC pen, sticky cards, one good oscillating fan per 2–3 plants, and a timer you trust.
If your genetics are suspect, start fresh with vetted, guaranteed seeds from our seed bank in Amsterdam—it's the easiest win.


