We love indoor labs, but oh boy, when you dial in an outdoor grow, the sun does things LEDs just can't.
This Ultimate Guide to Growing Cannabis Outdoors distills what we've learned running legal gardens and test plots: how to pick the spot, build living soil, choose climate-fit strains, and ride the season from sprout to sticky, terp-soaked harvest.
We'll keep it practical, data-forward, and hype where deserved. Expect pH targets, timeline guardrails, pest plays that actually work, and strain advice shaped by latitude and humidity.
Want reliable genetics for the backyard or balcony? We've grown, and smoked, what we sell at Weedseedsexpress, and we'll point you to the winners. Let's put the sun to work.
Key Takeaways
- Growing cannabis outdoors harnesses full-spectrum sunlight to boost terpene richness and yields while reducing energy costs and environmental impact.
- Selecting climate-appropriate cannabis strains with mould and pest resistance ensures healthier plants and more successful outdoor grows.
- Maintain soil pH between 6.0 and 7.0 with quality compost amendments to support strong root development and nutrient uptake.
- Provide 6–8 hours of direct sunlight daily, and use windbreaks and drainage strategies to protect plants from extreme weather.
- Implement a proactive Integrated Pest Management (IPM) plan including beneficial insects and early scouting to prevent infestations.
- Harvest cannabis based on trichome colour for desired effects, and cure properly in controlled humidity for enhanced flavour and potency.
Essential Gear & Supplies for Your Outdoor Grow
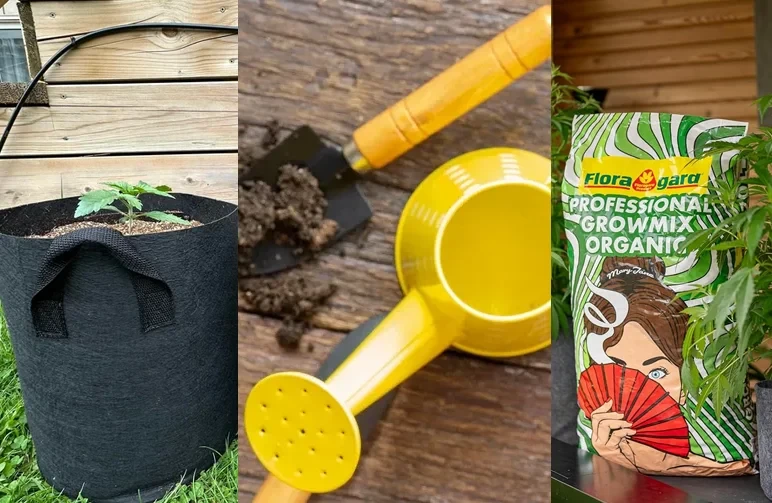
Before you pop a single seed, get your toolkit ready. Having the right gear on hand prevents last-minute scrambles and sets you up for success.
- ✅ Quality Seeds: The single most important investment. Choose genetics suited for your climate from a reputable source.
- ✅ Soil & Amendments: High-quality potting soil or compost, plus aeration like perlite or pumice. We recommend worm castings and kelp meal for a strong start.
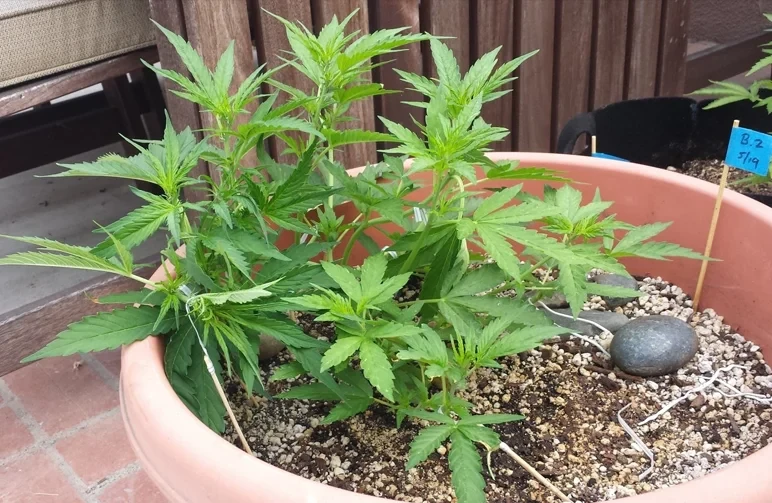
- ✅ Containers: Fabric pots (20+ gallons for photos) or a dedicated in-ground bed.
- ✅ pH Testing Kit: A simple pH pen or drop kit is non-negotiable for managing water and soil.
- ✅ Watering Can or Hose: Convenient access to water is crucial.
- ✅ Nutrients: A simple two-part veg/bloom nutrient line or organic amendments for top-dressing.
- ✅ Pruning Snips: A clean, sharp pair for training and trimming.
- ✅ Jeweler's Loupe (60x): Essential for inspecting trichomes to nail your harvest window.
- ✅ Plant Stakes & Ties: To support heavy branches late in flower.
- ✅ Pest & mould Control: Neem oil (for veg), insecticidal soap, and potassium bicarbonate are good to have on hand.
Why Grow Cannabis Outdoors? The Sun-Grown Advantage
Bigger Yields and Lower Costs
Outdoors, the sky's your light fixture and the ground's your pot. No electric bills for HID/LEDs, no fans humming 24/7, just free solar power and airflow.
With massive root volume and a full season of vegetative growth, plants can get tree-like, converting that energy into pound-plus yields per plant with smart feeding and training.
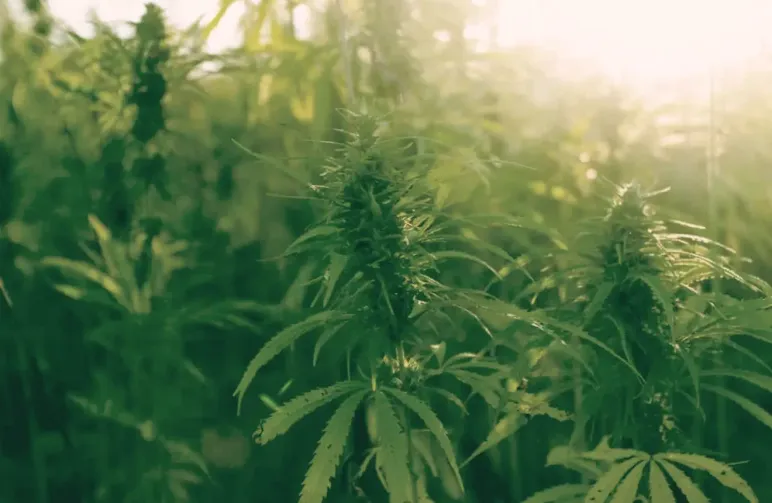
Harnessing the Power of Natural Sunlight
Full-spectrum sunlight drives robust photosynthesis and the production of secondary metabolites. We consistently see richer terpene profiles and thicker, more resilient plant structures outdoors.
Aim for 6–8+ hours of direct sun daily, south-facing in the Northern Hemisphere, so plants stack dense, resinous colas instead of reaching and fluffing in partial shade.
A More Sustainable and Eco-Friendly Choice
Outdoor cannabis cultivation dramatically slashes energy use and heat waste associated with indoor grows. By using compost, mulch, and capturing rainwater, you can create a nearly closed-loop system.
When you build healthy, living soil, you'll sequester carbon while you farm. Bonus: sun-grown flowers often show a broader expression of sesquiterpenes, which translates to deeper, earthier aromas and "hashy" finishes.
Before You Plant: Essential First Steps
Understanding Your Local Laws and Regulations
First, know the rules. Plant counts, fencing requirements, visibility from the street, odor mitigation, and distance from schools can vary wildly by region.
Confirm your local medical vs. adult-use allowances, storage/transport laws, and whether you can legally share clones. Compliance keeps you growing year after year without drama.
Creating Your Outdoor Grow Calendar and Timeline
Work backward from your area's first average frost date. In most temperate zones, you'll germinate indoors in early spring, transplant outside after the last frost, and harvest in late September or October, depending on the strain.
Autos can run from May to August in just 70–90 days. Pencil in key checkpoints: hardening off, mid-summer training, pre-harvest IPM, and flush windows.
Choosing the Right Cannabis Seeds: Photoperiod vs. Autoflower
Photoperiods size up all summer, then begin to flower as the days naturally shorten. They offer massive yield potential and incredible flexibility for training.
Autos are fast, discreet, and finish before the worst of the fall rains arrive, making them perfect for short seasons. For simplicity and guaranteed buds, always choose feminised seeds to avoid surprise males.
We stock both feminised and autoflower options.
| Feature | Photoperiod Seeds | Autoflower Seeds |
|---|---|---|
| Time to Harvest | 4-6+ Months | 70-90 Days |
| Yield Potential | Very High (can be 1lb+) | Moderate to High |
| Size | Can grow very large (6ft+) | Compact & Discreet (2-4ft) |
| Best For | Maximizing yield, advanced training | Short seasons, multiple harvests, beginners |
Selecting Strains Suited for Your Climate (mould and Pest Resistance)
Warm, dry zones: Sativa-leaning classics thrive (e.g., Sour Diesel, Durban).
Cool nights/short summers: Sturdy indica-leaners are your friend (Northern Lights, Blueberry).
Humid/rainy: If your climate is humid or rainy, starting with the right genetics isn't just a good idea—it's essential for avoiding crop-destroying mould. To take the guesswork out of it, we've created a definitive list of the best mould-resistant weed strains known for their resilience in tough conditions.
A Sample Outdoor Grow Calendar (Northern Hemisphere)
March/April: Order your seeds and gather supplies. Start amending your garden bed.
Late April/Early May: Germinate seeds indoors under a simple light.
Late May/Early June:After the last frost, begin hardening off your seedlings and transplant them into their final outdoor homes. Nailing this timing is crucial, as every region's last frost date is different.
For a detailed breakdown by climate zone, our guide on when to plant cannabis outside will help you pinpoint the perfect start date.
June-August: This is the vegetative stage. Focus on training (LST, topping), watering, and proactive pest management.
August-September: As days shorten, flowering begins. Switch to bloom nutrients and support heavy branches.
Late Sept-October: Monitor trichomes closely, flush your plants, and prepare for harvest before the heavy rains and frost arrive.
Location, Location, Location: Finding the Perfect Spot
Maximizing Sunlight: The 6-8 Hour Rule
This is non-negotiable: your plants need a minimum of 6–8 hours of direct, uninterrupted sun. Track the shadows from trees, your house, and fences throughout the day before you dig.
A south or southwest-facing exposure is money. If you're borderline, use reflective surfaces like a light-coloured wall to bounce extra photons back into the canopy.
Privacy and Security Considerations
No need to broadcast your garden. Use fencing, trellised vines, or tall companion plants like sunflowers to break sightlines. Lock gates, keep ladders stored away from fences, and avoid bragging about your grow online.
Pro-Tip: Plant aromatic companion herbs like lavender, mint, or rosemary nearby. They can help mask the distinct cannabis smell during flowering and deter certain pests at the same time.
Protection from Wind, Rain, and Extreme Weather
Constant, heavy winds can shred leaves and stress plants. Set up a simple windbreak using hedges or shade cloth. For heavy rain events, especially during flowering, have a plan.
You can use pop-up canopies or DIY clear corrugated panels to keep your flowers dry and prevent Botrytis (bud rot).
Ensuring Convenient Access to Water
You'll be watering a lot, so don't make it a chore. Proximity to a hose or spigot is a huge quality-of-life factor. Hauling five-gallon buckets across a yard gets old fast and leads to skipped feedings. Keep it easy on yourself.
Finding a location that balances all these factors—sunlight, privacy, and protection—is the foundation of a great outdoor season.
For a more detailed walkthrough on scouting locations, from analyzing sun paths to amending native soil, explore our complete guide to finding the best outdoor cannabis grow spots.
Of course, not everyone has a private backyard suitable for cultivation. If discretion is your top priority, an alternative method is 'guerilla growing.'
This advanced technique involves maintaining a secret spot in the wild, and our guerrilla cannabis growing playbook is an essential resource to do it safely and effectively.
Preparing Your Growing Medium: Soil and Containers
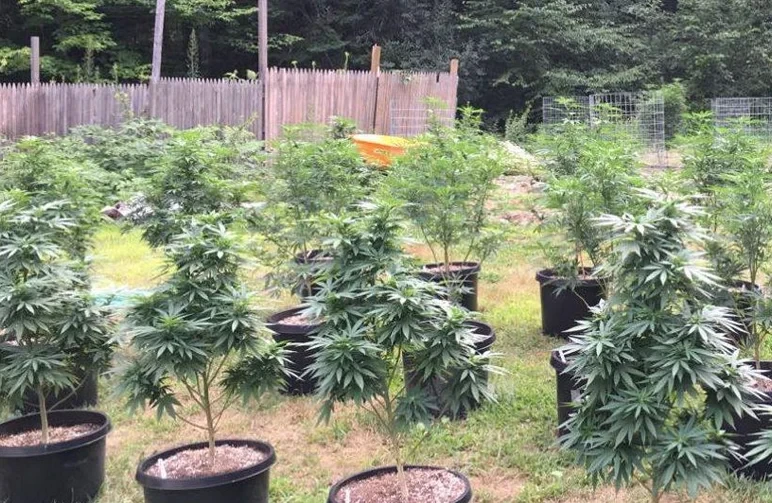
Growing in the Ground vs. Using Pots or Grow Bags

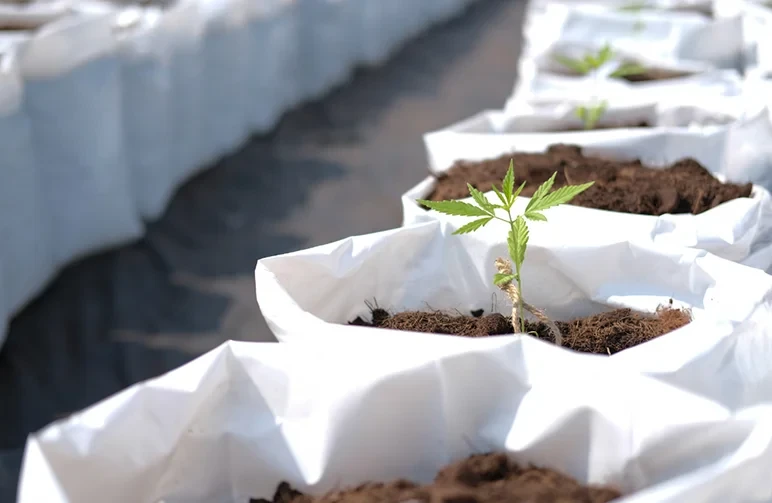
In-ground beds allow for massive root zones, offer thermal stability, and can produce the biggest yields. Pots or fabric grow bags offer mobility, better drainage control, and the flexibility to chase the sun.
We love 20–50 gallon fabric bags for their superior heat management and "air-pruning" effect on roots.
What Makes a Quality Soil? (Composition, pH, and Drainage)
Aim for a loamy, well-aerated soil with a stable pH between 6.0 and 7.0. A great mix is typically 40–50% high-quality compost, 30% aeration (perlite, pumice, or rice hulls), and a mineral base.
Avoid heavy, dense clay, as poor drainage is a leading cause of root rot. Your soil should hold moisture but drain freely within seconds when saturated.
Amending Your Soil with Compost and Nutrients
Your goal is to feed the soil food web, which in turn feeds your plant. Blend in worm castings, quality compost, and slow-release meals (kelp, neem, crustacean) a few weeks before you plant.
Top-dress with compost monthly and maintain a 2–3 inch layer of mulch (straw works great) to retain moisture and keep roots cool.
The Cannabis Growth Stages Outdoors
Stage 1: Germination and Planting Your Seeds (Weeks 1-2)
Pop seeds in a moist paper towel or directly into starter plugs at a warm 70–78°F. Once taproots emerge, transplant them into small pots under a gentle light. Keep the media evenly moist, not soggy.
Stage 2: The Seedling Stage (Weeks 2-4)
Baby plants like bright but not intense light, gentle airflow, and stable temps (60–80°F). Don't drown them; tiny roots need oxygen. Once you have 3–4 sets of true leaves (nodes), they're ready for the first light feeding.
Stage 3: The Vegetative Stage (4-12+ Weeks)
This is the explosive growth phase. Top your plant above the 4th–6th node to encourage a bushy structure, then begin Low-Stress Training (LST) to spread branches horizontally.
The more sun and root space you provide now, the bigger the frame for flowering.
Stage 4: The Flowering Stage (8-12+ Weeks)
As days shorten, flower clusters (colas) will form. Shift to nutrients higher in Phosphorus (P) and Potassium (K) and ease off the Nitrogen (N). Defoliate modestly to improve airflow to the interior of the plant.
Stake or trellis heavy colas so late-season storms don't snap your hard work.
Caring for Your Plants: From Seedling to Harvest
Watering Your Outdoor Cannabis: How Much and How Often?
The rule is deep, infrequent watering. Saturate the pot or bed until you see slight runoff, then wait until the top 1–2 inches are completely dry before watering again.
This encourages roots to grow deep in search of water. In heat waves, watering in the cool morning is best.
A Guide to Nutrients: Feeding in the Vegetative and Flowering Stages
- Veg: Higher Nitrogen (N), steady Calcium/Magnesium, and micronutrients.
- Flower: Lower N, higher Phosphorus (P) and Potassium (K) for bud development, plus sulfur for terpene synthesis.
- Always start low with nutrient doses and increase slowly. Watch your leaf tips—if they start to burn, back off immediately.
Pruning and Training Techniques for Bigger Yields (LST, Topping)
We typically top once or twice, then go heavy on LST to create a wide, flat canopy where every bud site gets direct sun. Lollipopping (removing the lower, fluffy bud sites) in early flower redirects the plant's energy to the main colas.
Don't overdo it—leaves are your solar panels.
Hardening Off: Acclimating Your Young Plants to the Outdoors
Indoor-raised seedlings will get shocked if you throw them straight into the elements. They need a week to adapt. Start with 1–2 hours of gentle morning sun, increasing the duration daily while protecting them from harsh wind.
After 4–5 days, you can leave them out longer, then overnight. This critical step prevents sunburn and stunting.
Common Outdoor Pests and Problems (And How to Solve Them)
Identifying and Preventing Common Pests (Spider Mites, Caterpillars, Aphids)
Scout under the leaves twice a week. Introduce beneficial insects like ladybugs early on. Use BT (a natural bacterium) for caterpillars, and apply neem oil or insecticidal soap during the vegetative stage.
Avoid spraying any oils in late flower. Sticky traps and visual inspections will help you catch issues before they become infestations.
To build a complete, proactive strategy using companion planting and beneficial insects, dive into our comprehensive guide to organic pest-control for outdoor cannabis.
Battling mould and Powdery Mildew
Airflow is king. Space plants properly, defoliate lightly, and prune interior larf. Always water in the morning, not at night, so foliage can dry.
For botrytis (bud rot), immediately remove any affected buds with sterilized snips and get them far away from your garden.
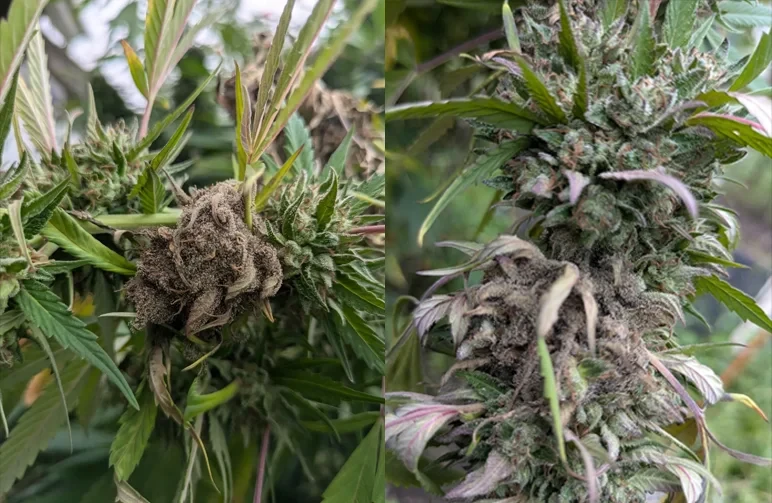
Photo credit: u/jerkin365 via Reddit.
Protecting Your Garden from Larger Animals
Deer, rabbits, and raccoons all love cannabis. A sturdy perimeter fence combined with a 2–3 ft chicken wire collar around the base of your plants will save your stems.
For gophers, use wire gopher baskets when you plant. Hardware is the best insurance.
Harvest Time: How to Know When Your Buds Are Ready
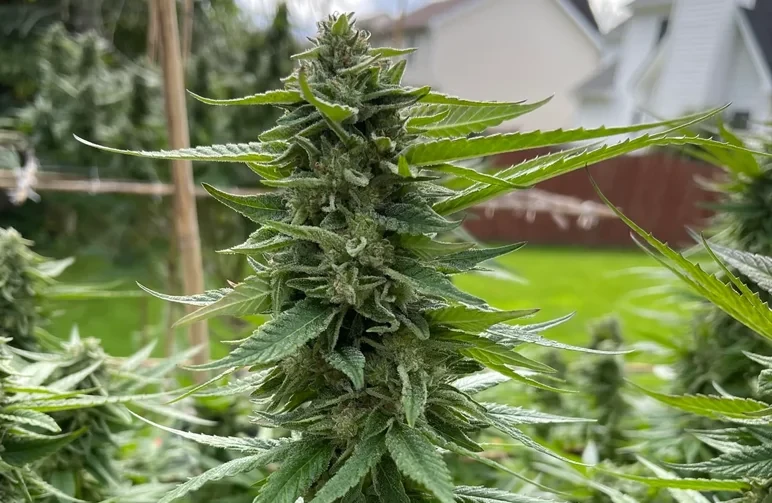
Identifying the Signs of Peak Maturity
Pistils will darken and curl inward, the calyxes will swell up, and the aromas will sharpen from "green" to intensely pungent.
Fan leaves may begin to fade and yellow as the plant uses up stored nitrogen. Buds should feel dense and tight to the squeeze.
Checking Trichomes: The Clear, Cloudy, and Amber Method
This is the only 100% reliable method. Use a 60x jeweler's loupe to inspect the resin glands (trichomes):
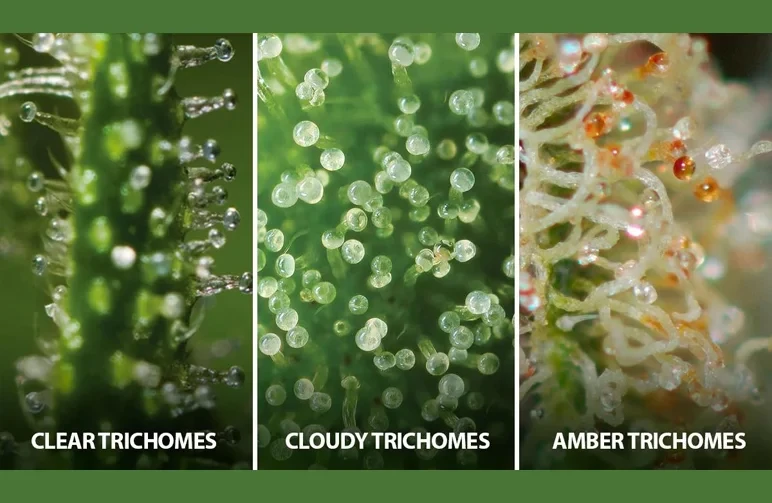
Clear: Not ready. THC is low.
Cloudy/Milky: Peak THC. Effects will be more vibrant and cerebral.
10–20% Amber: THC is degrading into CBN. Effects will be more sedative with a strong body high.
Decide your desired effect profile, then harvest accordingly.
The Step-by-Step Harvesting Process
- Stop feeding heavy nutrients 7–10 days prior (plain water only).
- Harvest in the cool of the morning when terpene levels are highest.
- Cut branches and remove the large fan leaves.
- Hang branches in a dark room with a temperature of 60–68°F and humidity of 55–62% RH.
- Keep air moving gently with a small fan, but never point it directly at the buds.
Post-Harvest: Drying and Curing for Quality and Potency
How to Properly Dry Your Cannabis Buds
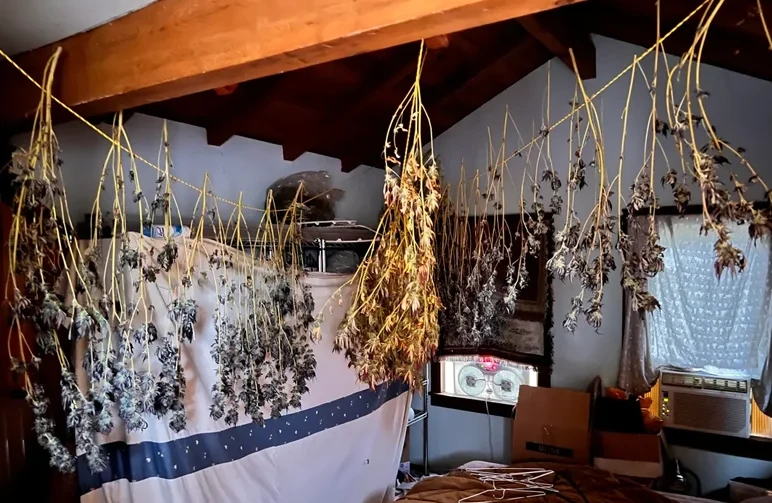
Target 60–68°F and 55–62% RH for a slow dry over 7–14 days. You'll know they're ready when the smaller stems snap instead of bending.
Drying too fast makes your cannabis smell like hay; too slow risks mould. Darkness is crucial to preserve terpenes.
The Art of Curing in Jars for Optimal flavour and Aroma
Once dry, trim your buds and place them in airtight glass jars, filling them about 75% full. Use a small hygrometer in the jar to monitor humidity—aim for 60–62% RH.
"Burp" the jars by opening them for a few minutes daily for the first week, then every few days for the next 2–3 weeks. This process mellows the harshness and allows the true flavour and aroma to bloom.
Long-Term Storage Solutions
Store your cured buds in airtight glass jars in a cool, dark cupboard. Heat, light, and oxygen are the enemies of potency. Properly stored, your harvest will easily maintain its quality for 6–12 months.
10 Common Mistakes to Avoid When Growing Outdoors
- Planting Too Early or Too Late: Planting before the last frost will stunt or kill your plants. Planting too late means you'll run out of good weather before your buds can fully mature.
- Overwatering and Overfeeding: More growers fail from too much love than too little. Soggy roots suffocate. Let your soil dry out. With nutrients, less is more.
- Ignoring Soil pH and Quality: If your pH is out of the 6.0–7.0 range, your plants can't absorb nutrients, leading to lockouts and deficiencies. Don't guess—test your soil and water.
- Not Preparing for Pests Until It's Too Late: IPM is proactive, not reactive. Set traps and scout for pests weekly, long before you see a full-blown infestation.
- Harvesting Too Early: Patience steals potency and flavour. Don't chop just because the pistils changed colour. Trust the trichomes. We've seen 10–15% more weight added in the final week. Patience tastes better, every time.
- Choosing the Wrong Genetics: Don't try to grow a long-flowering tropical sativa in a region with a short, wet summer. It's a recipe for mouldy disappointment.
- Forgetting About Security: A visible plant is a target for thieves. Be discreet.
- Not Supporting Your Plants: Heavy, resinous colas will snap branches in wind and rain. Use stakes or a trellis before you need them.
- Skipping the "Hardening Off" Process: Moving a plant from indoors directly into the intense outdoor sun is like getting a severe sunburn. You'll set your growth back by weeks.
- Improper Drying & Curing: You can do everything right for 6 months and ruin your entire harvest in one week with a poor dry/cure. Don't skip this final, crucial step.
Glossary of Common Cannabis Growing Terms
Calyx: The small, teardrop-shaped pod that makes up the actual "bud" or flower of the cannabis plant.
LST (Low-Stress Training): The technique of gently bending and tying down branches to create a wider, more even canopy.
Photoperiod: A plant that flowers based on the number of light/dark hours it receives.
Pistil: The hair-like strands that emerge from the calyx, designed to catch pollen. They are a visual indicator of maturity but less reliable than trichomes.
Terpenes: The aromatic oils that give cannabis its distinct smells and flavours (e.g., pine, citrus, berry).
Topping: A pruning technique where the main top shoot of the plant is cut off to encourage it to grow two new main colas, resulting in a bushier plant.
Trichomes: The microscopic, mushroom-shaped resin glands that cover cannabis flowers and produce cannabinoids (THC, CBD) and terpenes. They are the primary indicator of potency and harvest readiness.
Frequently Asked Questions About Growing Cannabis Outdoors
What are the main benefits of growing cannabis outdoors compared to indoors?
Growing cannabis outdoors offers huge cost savings by eliminating electric bills for lighting and ventilation.
It enables plants to develop larger root systems and achieve bigger yields, while harnessing natural, full-spectrum sunlight that enhances terpene profiles and overall flavour.
How much direct sunlight does outdoor cannabis need daily for optimal growth?
Cannabis plants require at least 6 to 8 hours of direct, unfiltered sunlight each day.
South-facing locations in the Northern Hemisphere are ideal to maximize sun exposure, which promotes dense, resinous buds and healthy plant development.
Which cannabis strains are best suited for different outdoor climates?
Warm, dry climates favor sativa-dominant strains like Sour Diesel. Cooler regions with shorter summers benefit from sturdy, fast-finishing indica-leaning strains such as Northern Lights.
For humid and rainy areas, it's crucial to use mould-resistant varieties like Green Crack to reduce the risk of bud rot.
What's the difference between growing in soil vs. a greenhouse?
Growing directly in soil is the most natural method, leveraging the sun and earth. A greenhouse acts as a middle ground, using natural sunlight but offering protection from rain, wind, and pests.
It allows for greater environmental control and can extend your growing season, but requires more investment and management.
How much can I expect to yield from one outdoor plant?
Yield varies massively based on genetics, container size, and the length of your growing season. A small autoflower in a 10-gallon pot might yield a few ounces.
A large photoperiod plant grown in a well-amended 50-gallon pot or directly in the ground can easily yield one to two pounds or more of dried flower.
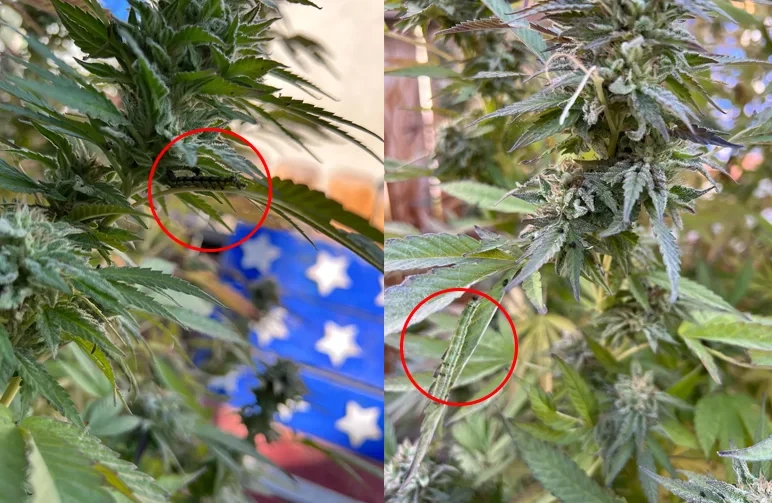
What do I do if my plant gets pollinated?
If your female plant is pollinated by a male, it will stop putting energy into producing resinous flowers and start producing seeds. Your buds will be smaller, less potent, and full of seeds.
If you spot a male plant (pollen sacs instead of pistils) in your garden, remove and destroy it immediately to prevent it from pollinating your females.


